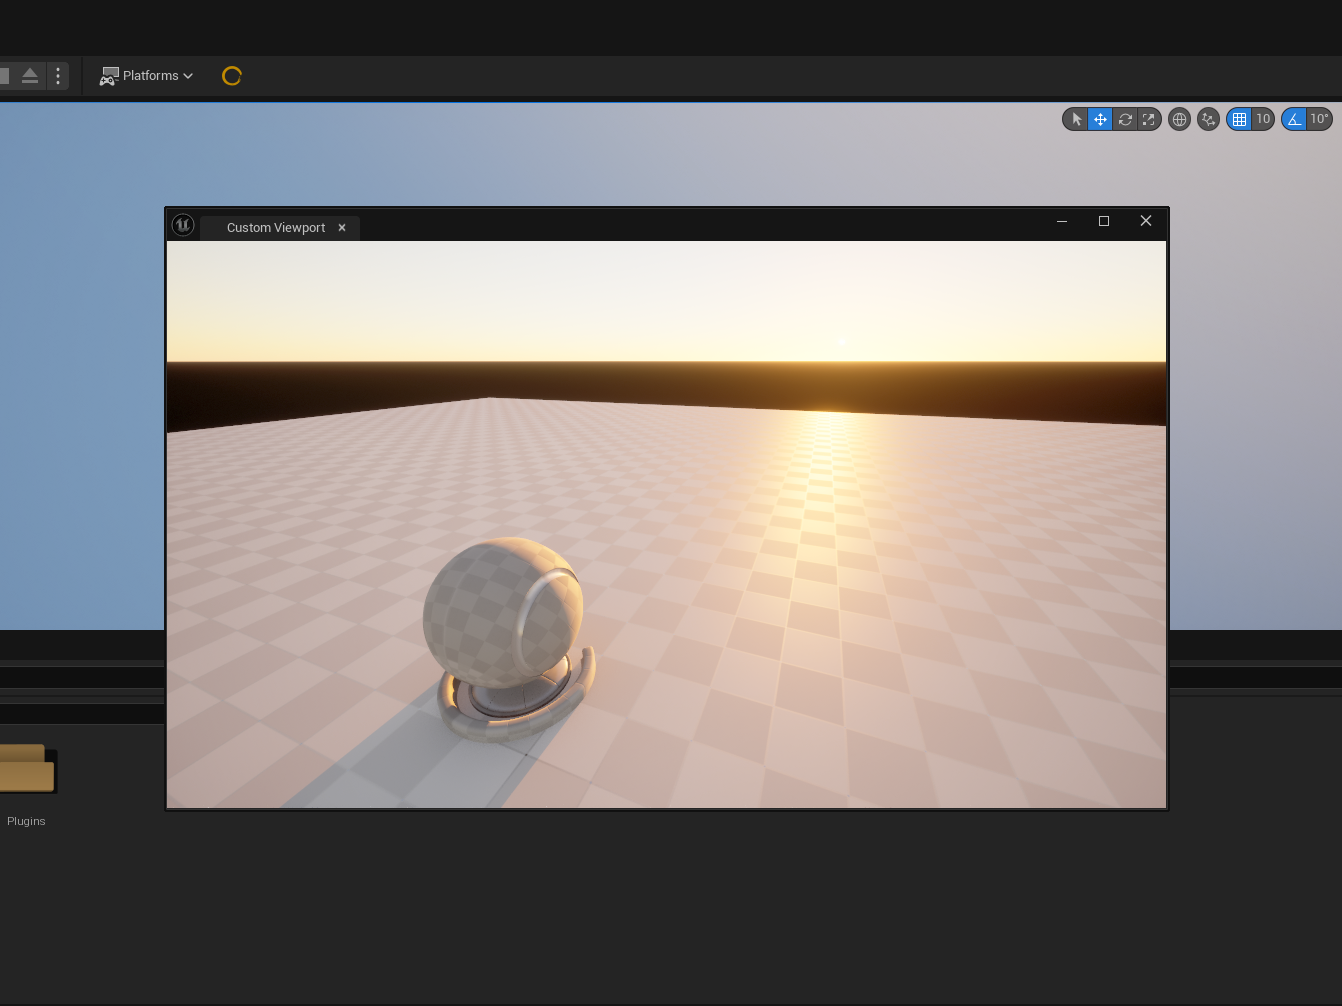
Creating a Custom Viewport without C++ - Part 1

Introduction
To start the written part of the tutorial off, I'd like to say that I am assuming some prerequisite knowledge of blueprints and editor utility widgets. Additionally, in the section containing the formulas and setup for camera movement/rotation, I am aware there are other/better ways to set this up, and please feel free to set them up however you'd like, as the main point of this tutorial is to make you aware of how to get to that point to start with.
Editor Widget Utility Designer Setup
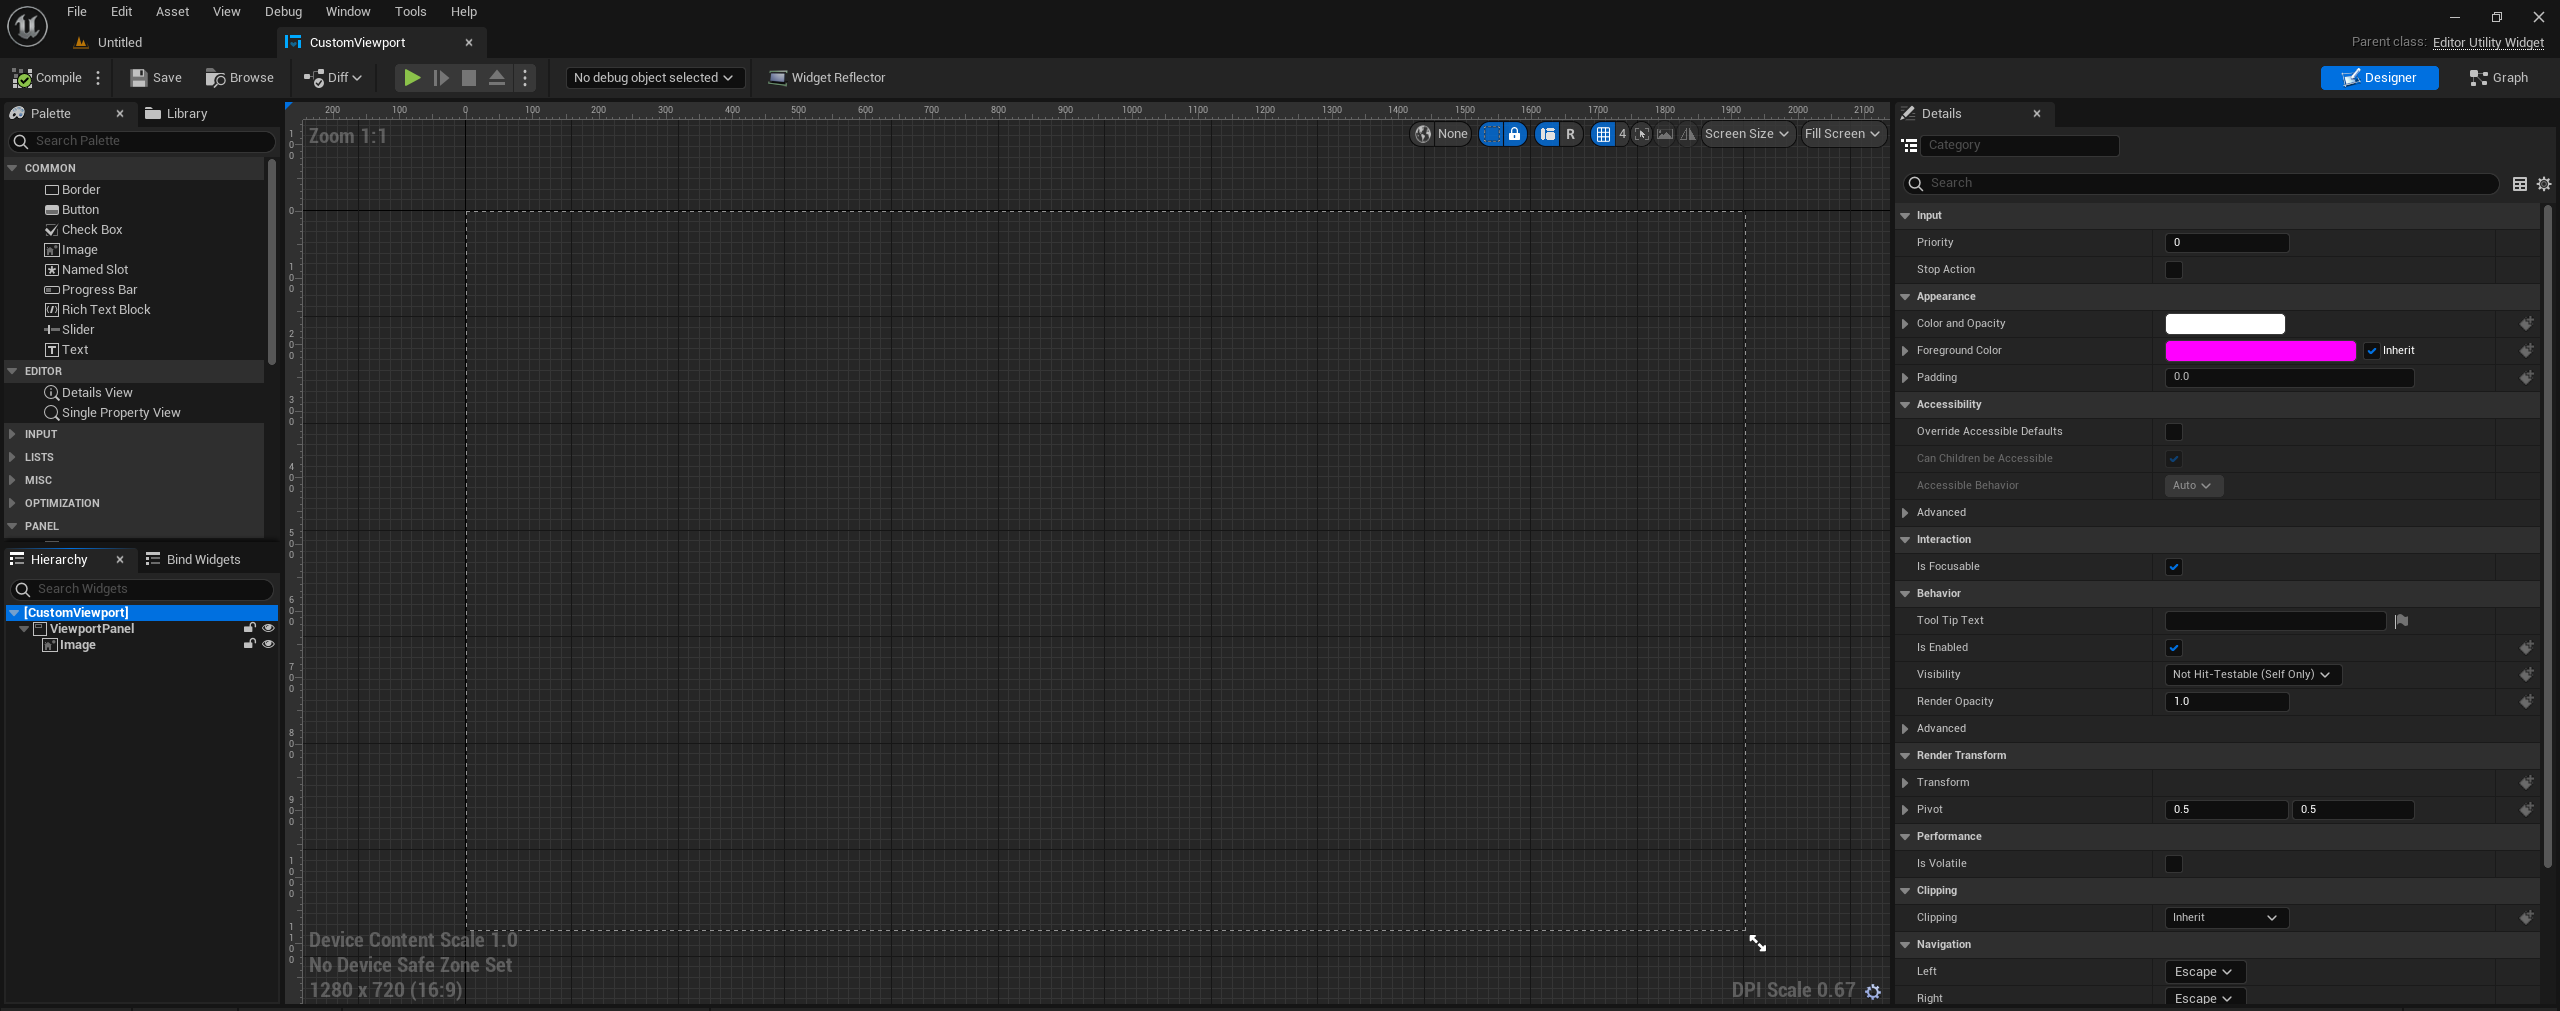
There are a few requirements needed via the Designer section of the editor widget, so I'll list those here along with images. If you get confused, refer to the video as I show the setup in depth there, too.
Hierarchy -
Self - Set Is Focusable to true.
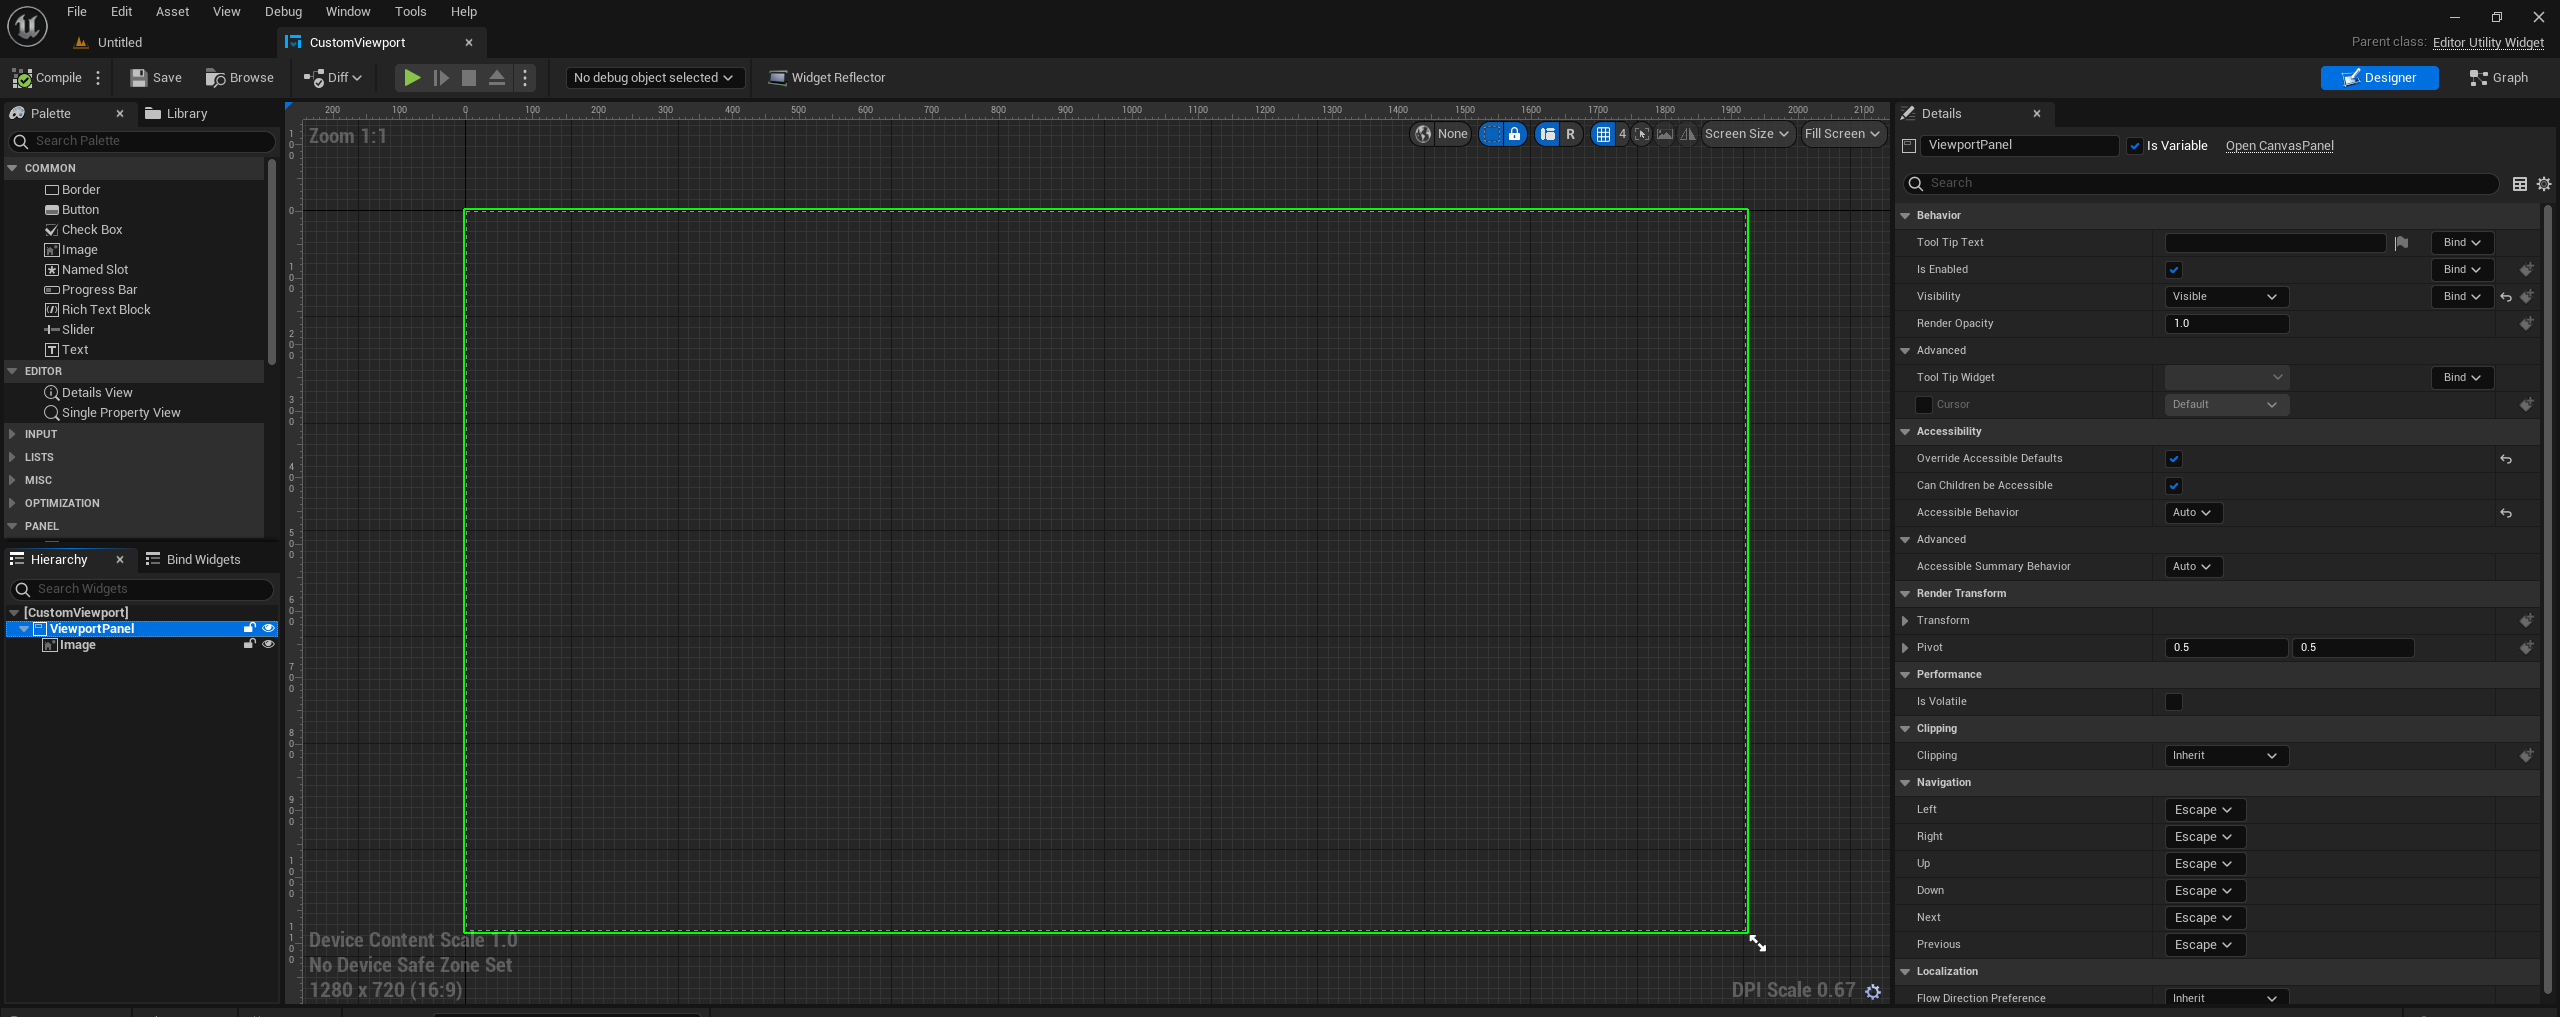
Canvas Panel - Is Enabled (True), Visibility (Visible), Override Accessible Defaults (True), and Accessible Behavior (Auto).
Image - Size (1920x1080), ZOrder (1), Brush Tint Color (set Alpha to 0), Is Enabled (True) and Visibility (Visible).
Also make sure that the Canvas Panel and Image have Is Variable set to true.
The reason we set these things up like this because our widget needs to be able to listen for inputs, and not all widget children have the same behavior when it comes to inputs (key presses, mouse movement, etc). The Image widget is included so that we can detect mouse movement, which we need to replicate camera controls in the viewport. Same goes for key presses.

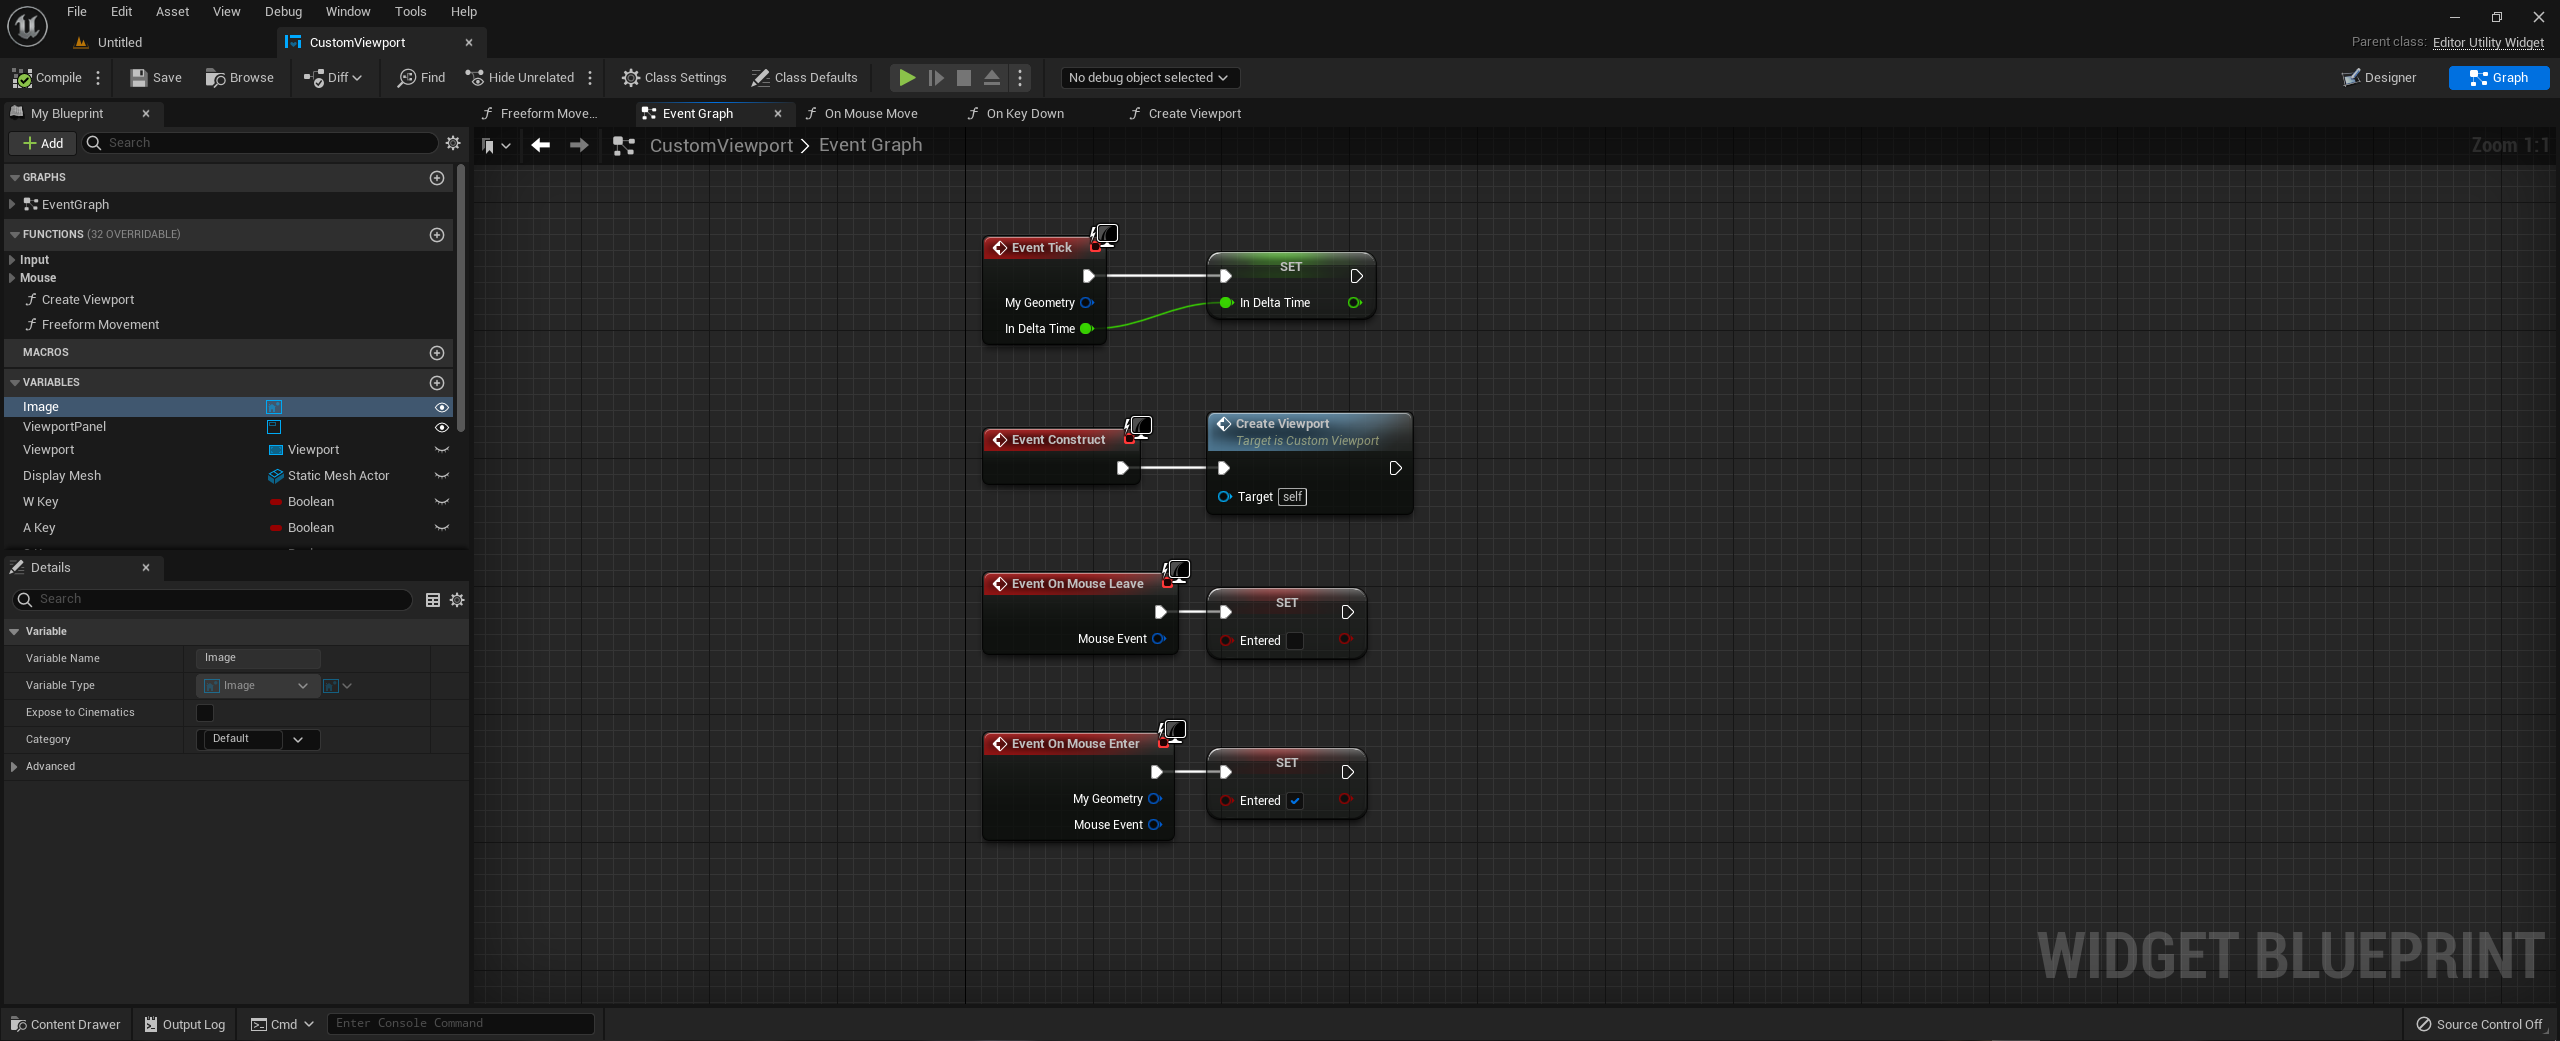
Event Graph
In the event graph, we want to setup just a few things.
On Event Tick, drag off from In Delta Time and set a variable from it. We'll use this for camera rotation later.
On Event Mouse Enter and On Event Mouse Leave, set a boolean named Entered.
Create a function called Create Viewport and have it fire off from Event Construct.
We put the viewport function behind Event Construct and not Pre Construct because we do not want to instantiate the viewport over and over again.
Create Viewport Function Intro
To start, we're going to use the Construct Object node to spawn the viewport from the Viewport class, with the outer set to Self.
Next, we need to add the viewport as a child to the canvas panel, and then cast to the canvas panel slot to set the slot size and anchors.
Finally, we use the Set View Location with the target being the Viewport. The reason for this is the Viewport class actually contains a world, and we're setting the viewport location within that world.
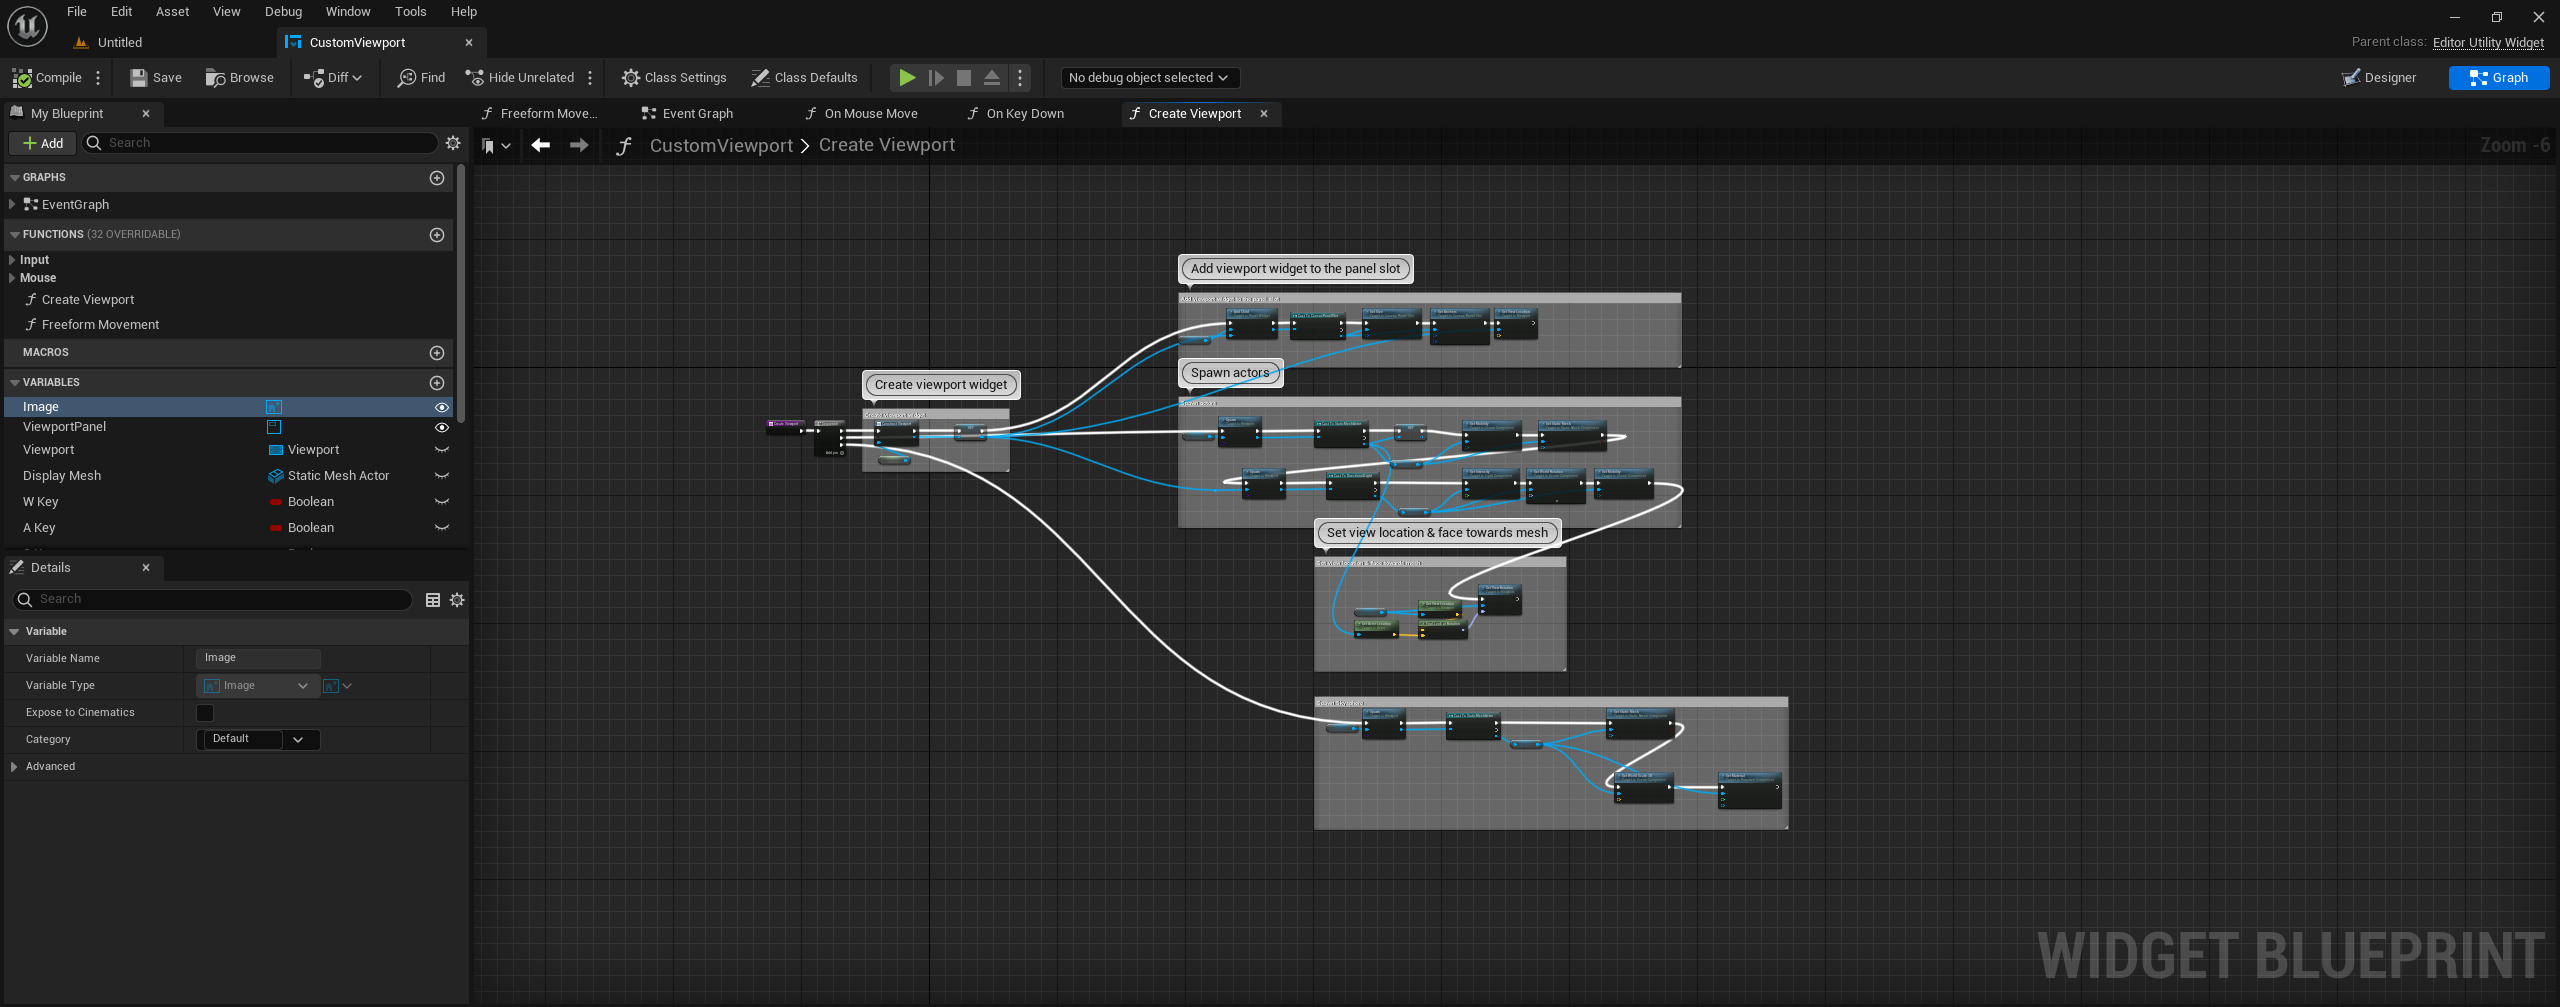
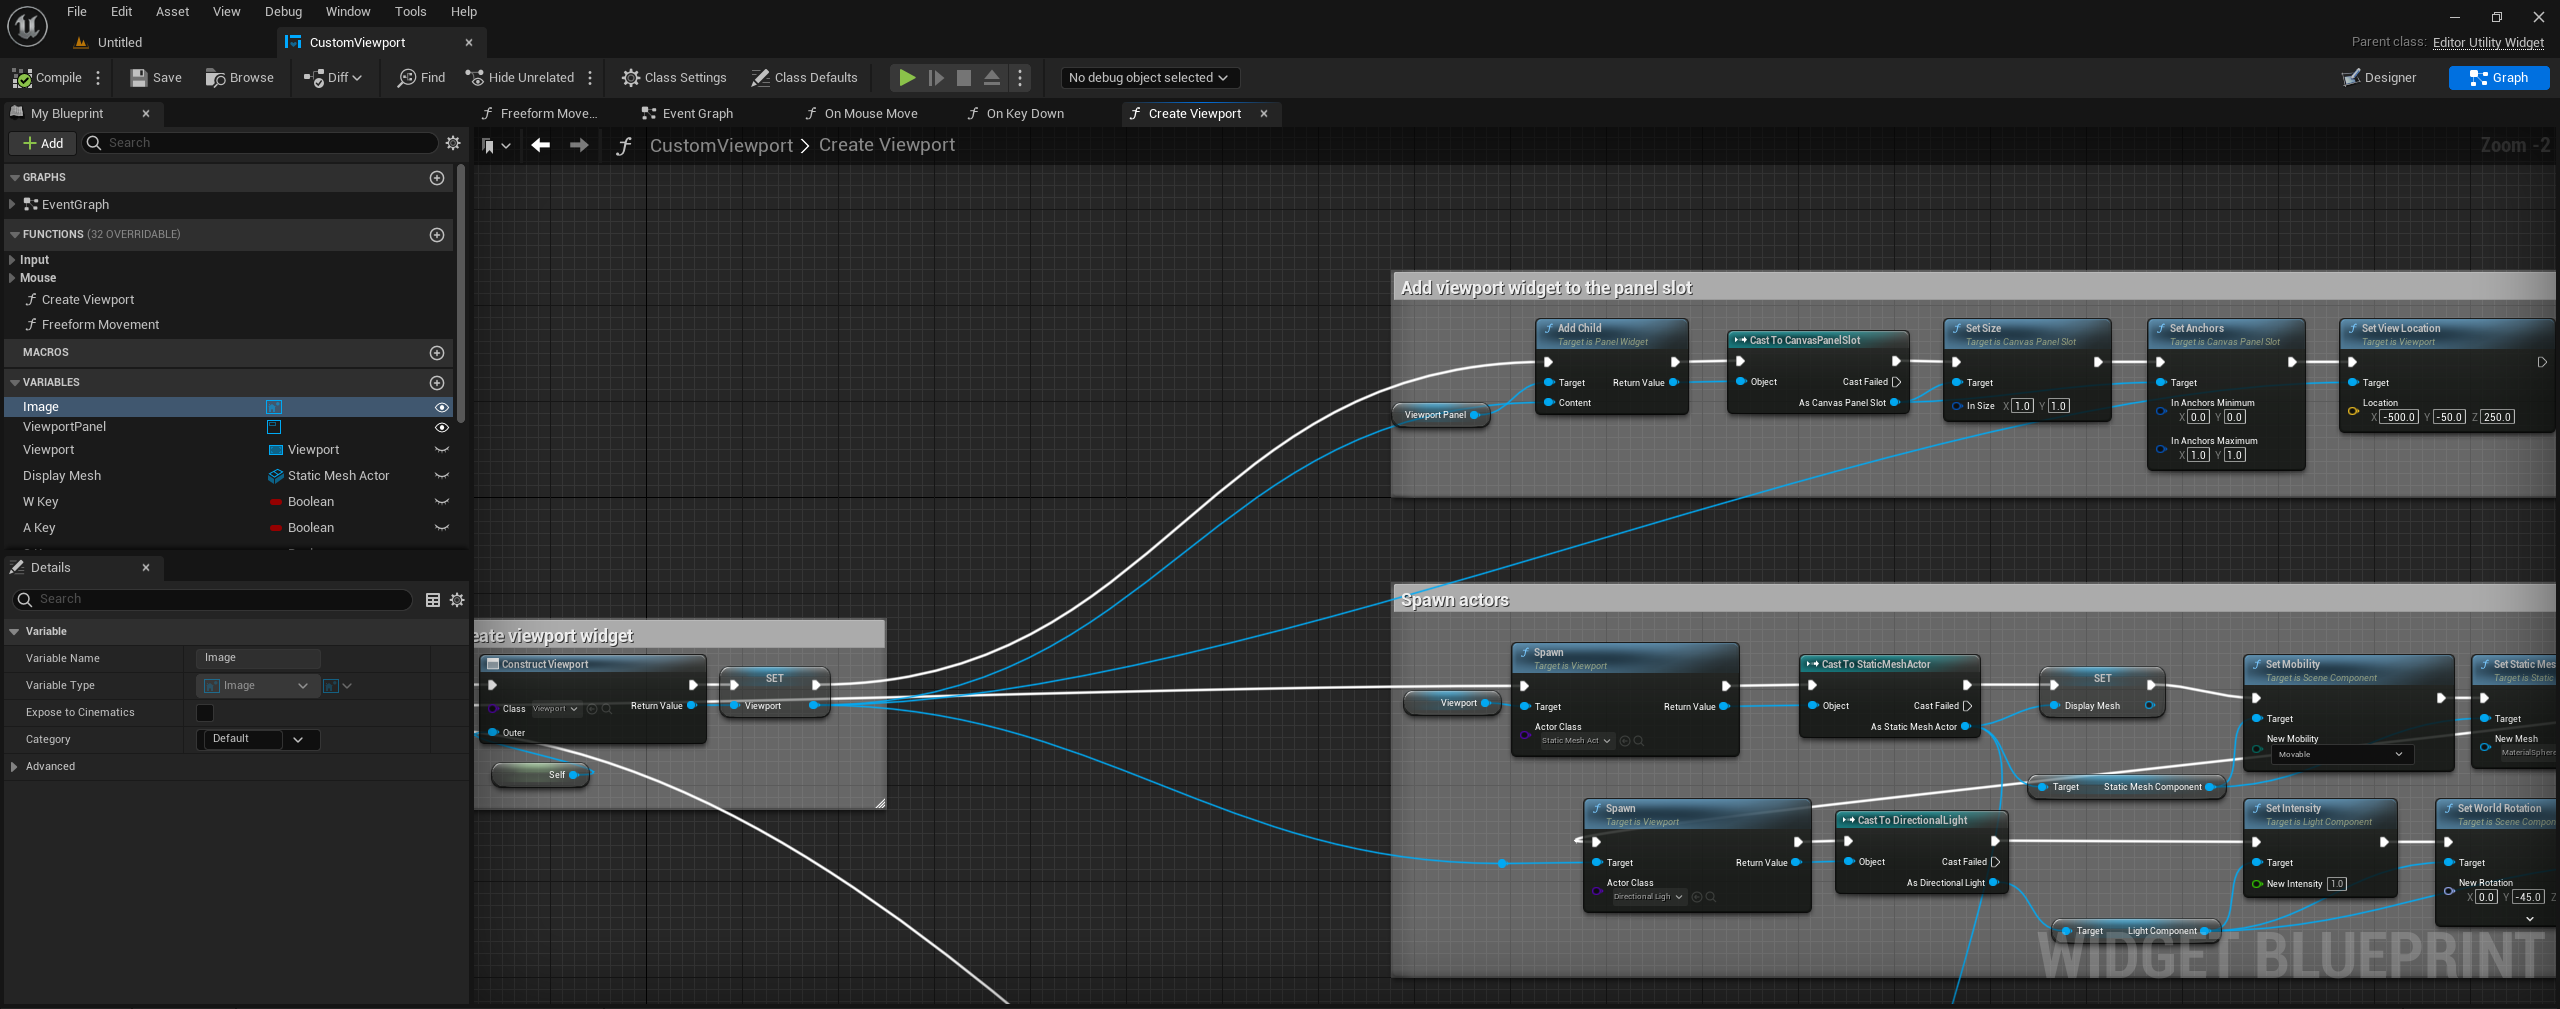
Create Viewport Function Object Spawning
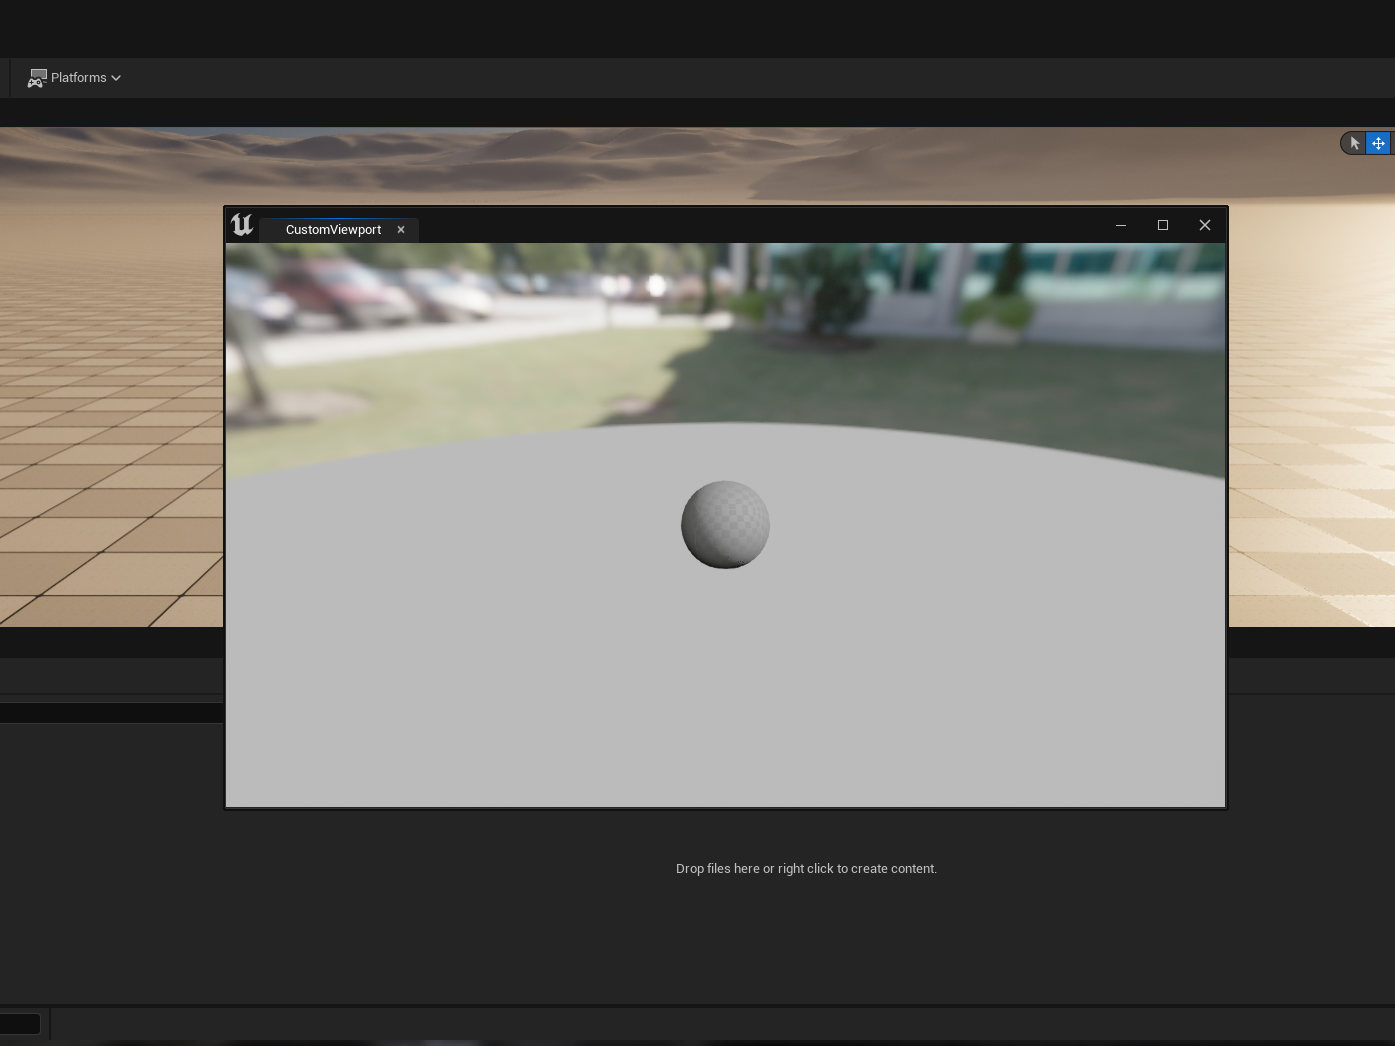
As stated before, the Viewport contains a world, and if we don't populate it with objects and light, it will just be black.
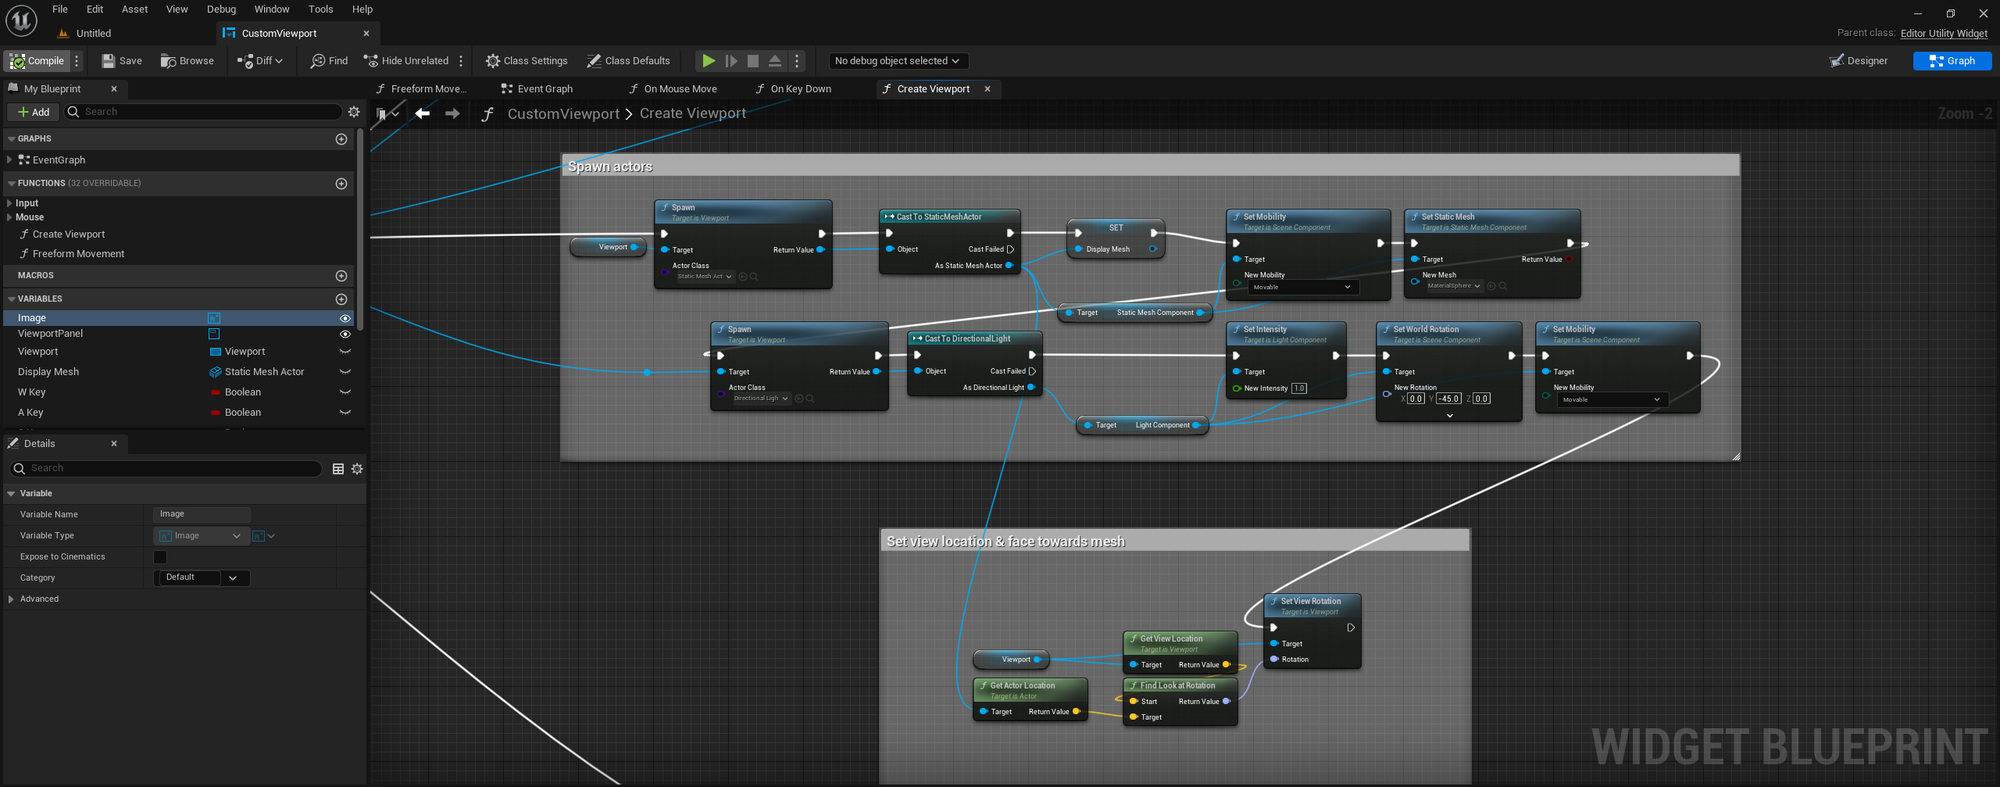
To begin, drag off from the Viewport variable and type Spawn. The node will ask for a class, so for this tutorial, we'll be using the static mesh actor class. Cast from that, set the output as a variable and drag out from As Static Mesh actor to get the static mesh component. We want to then set the mobility to movable, and the reason for this is that after the viewport is constructed, we cannot swap out static meshes unless the component is set to movable. From there, we use a set static mesh to be whatever mesh we want.
The same setup is used to spawn a directional light.
Finally, we're getting the Viewport Location, the Actor Location of the mesh we just spawned, and setting our viewport rotation to face our mesh on construct.
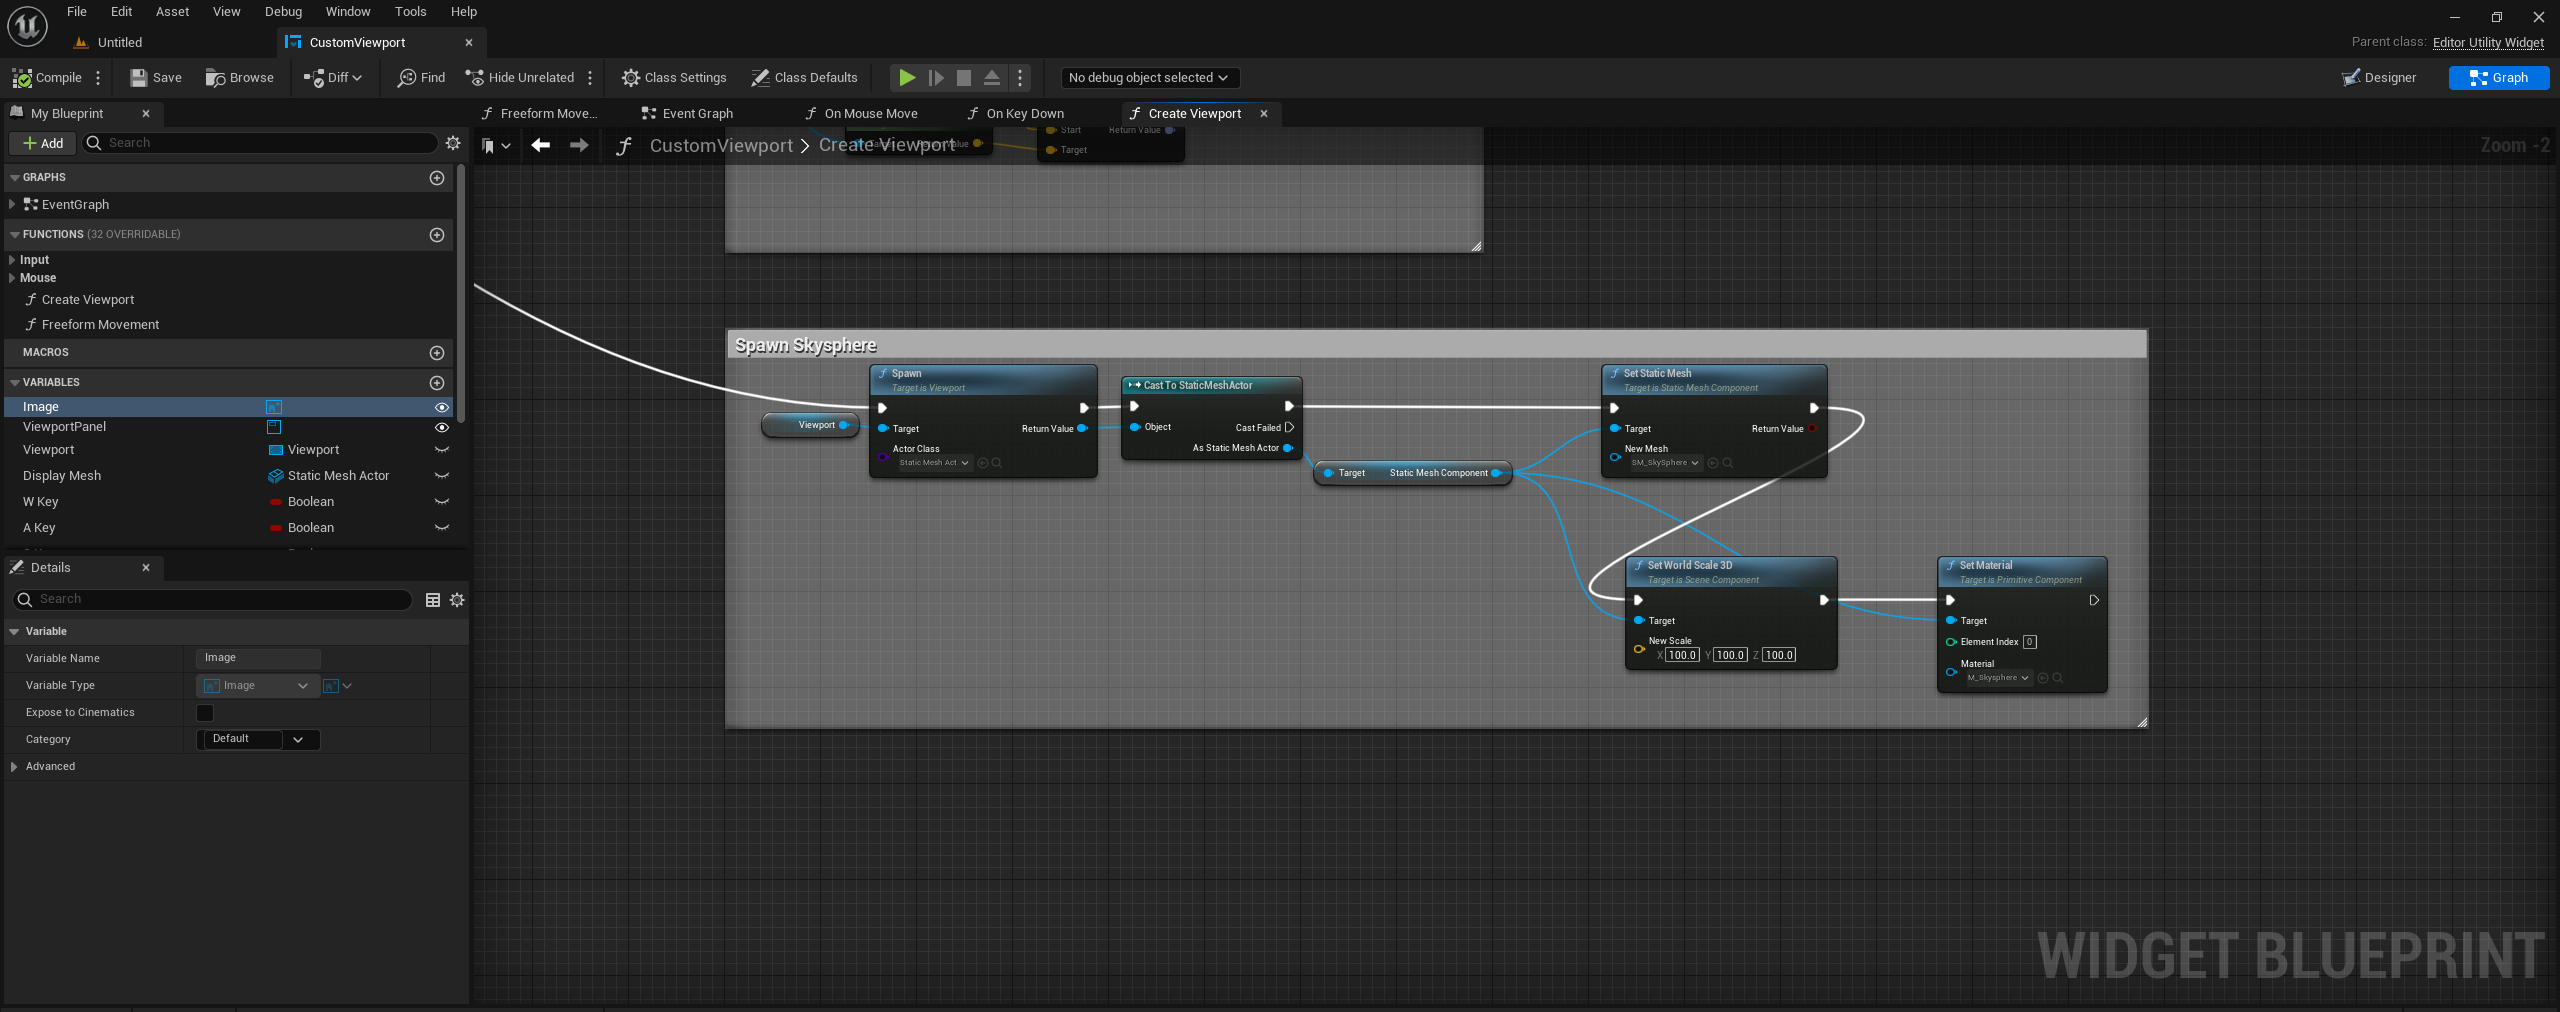
Create Viewport Function Skysphere
The final part of our function is used to spawn a skysphere, like the material editor and static mesh editor.
In the blueprint, this is largely the same as before, just with the addition of setting the scale and material on the mesh.
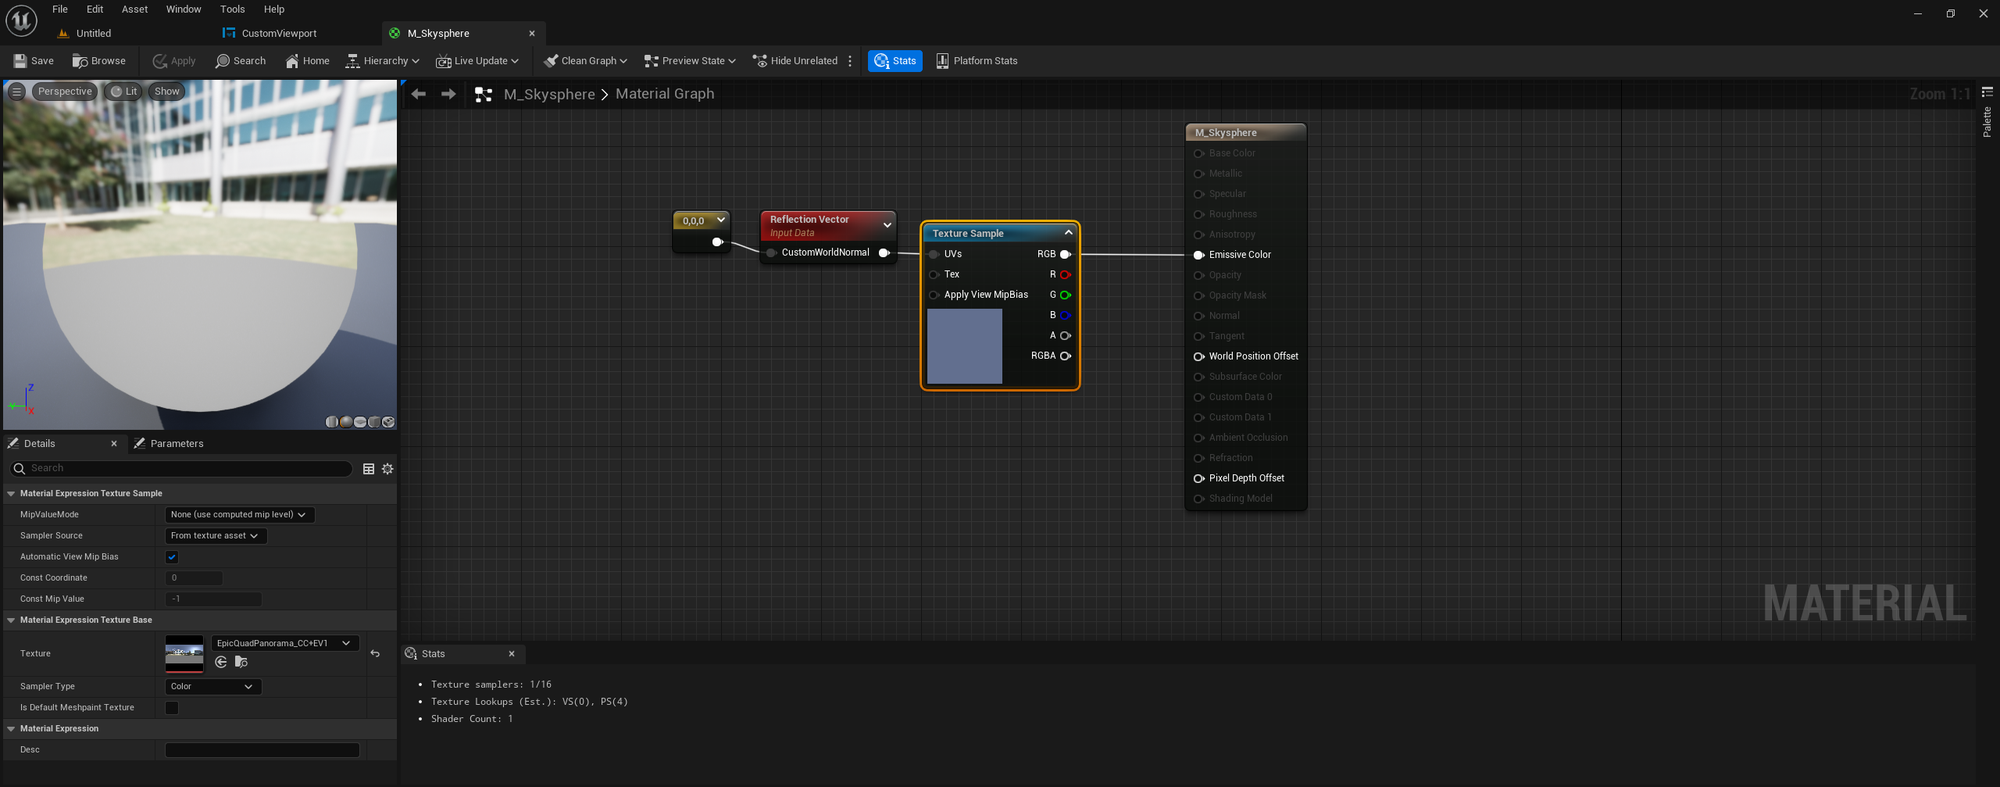
The material used is a simple one; create a new unlit material with a reflection vector going into a cubemap. That's it.
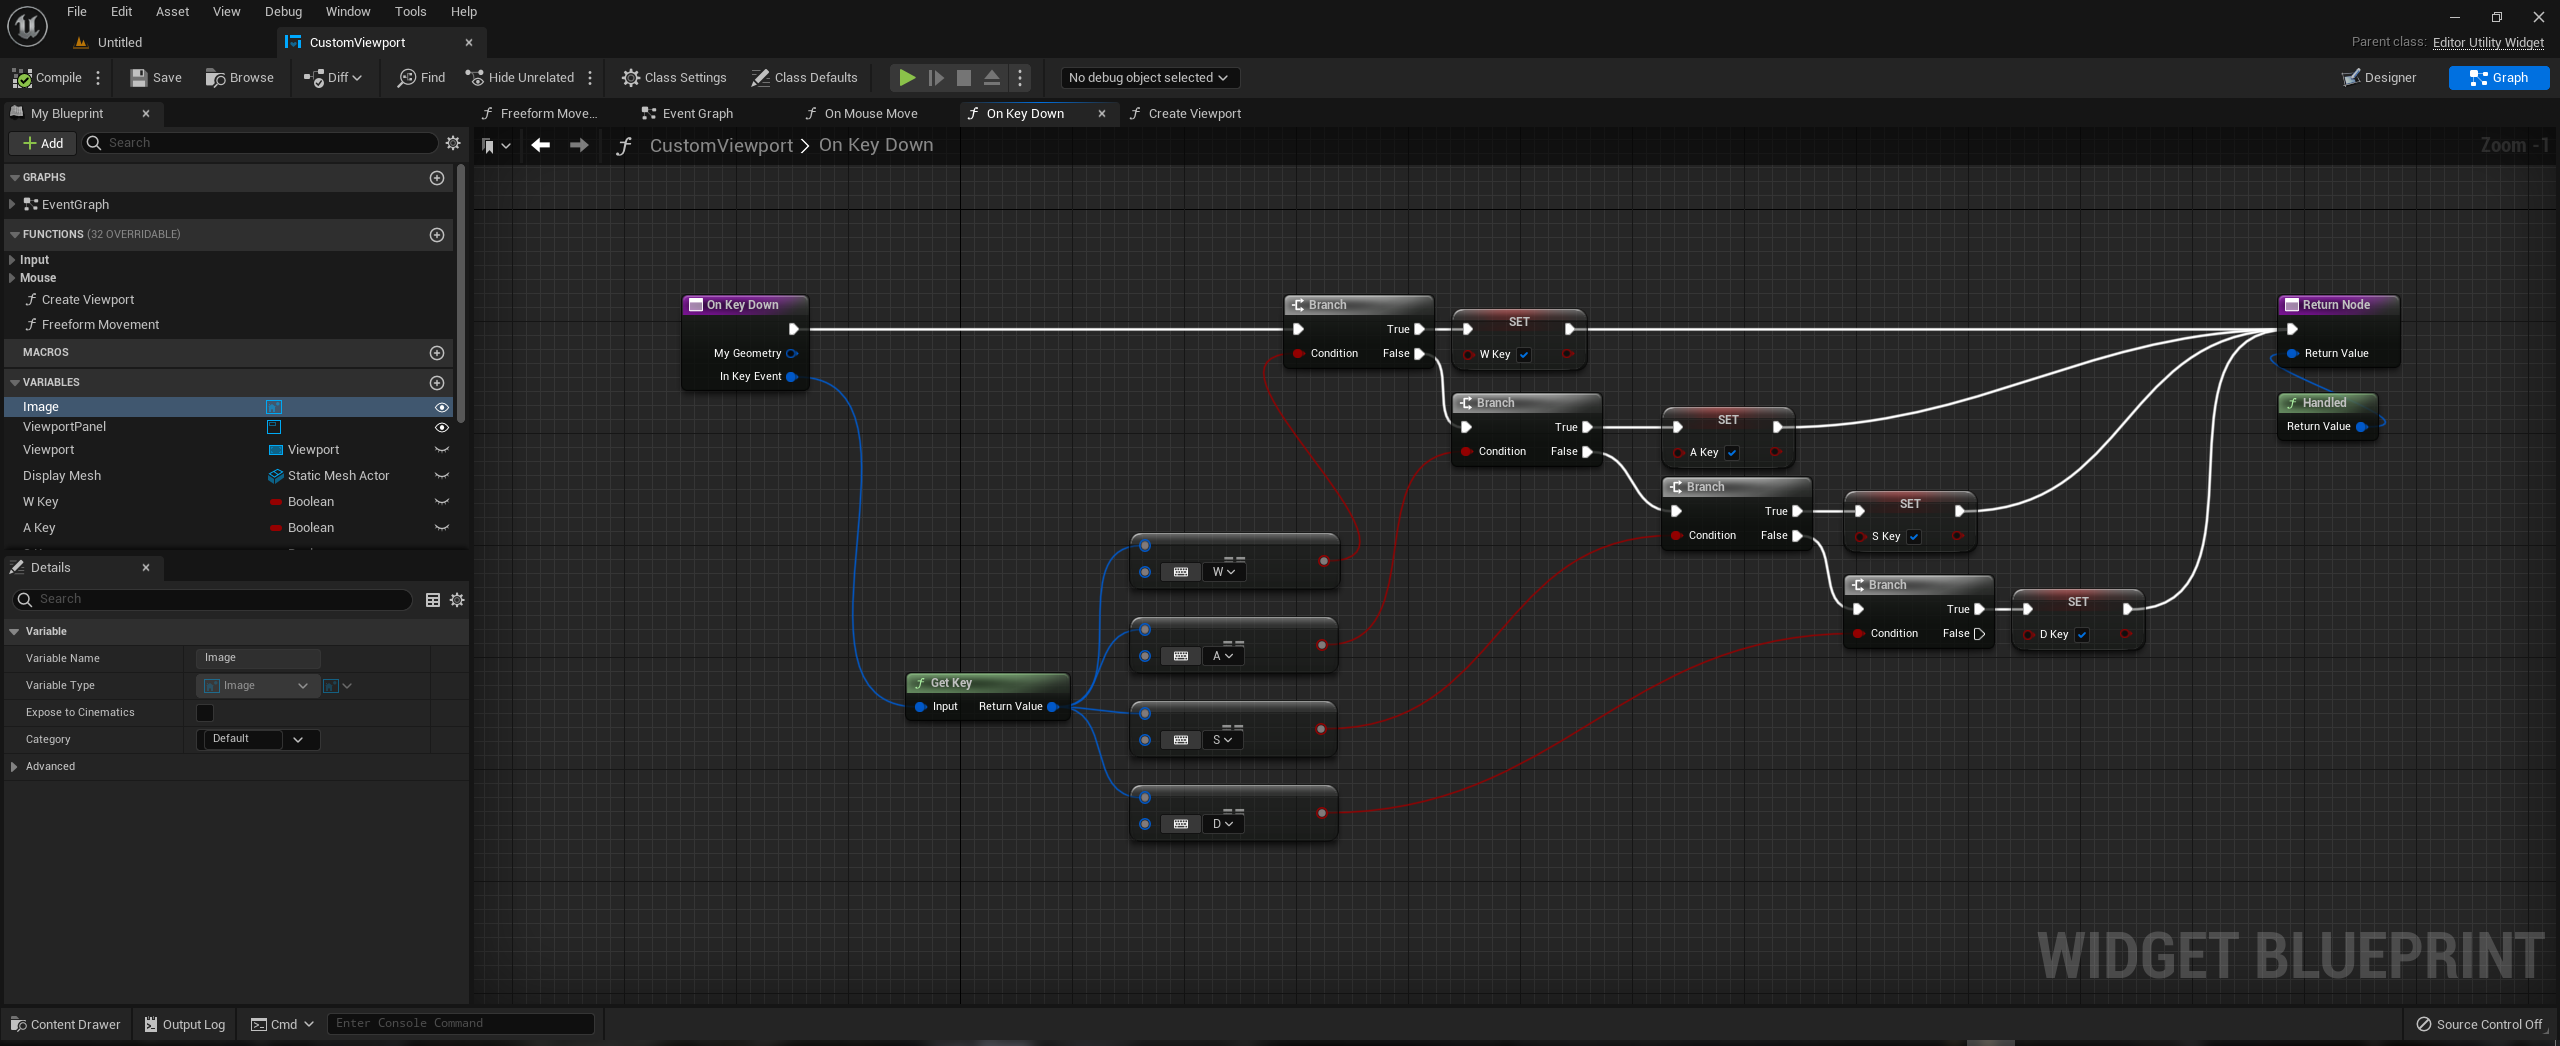
Function Overrides - Key Up/Down
Now that we're finished with the viewport function, we have to setup 3 function overrides for mouse movement and key presses.
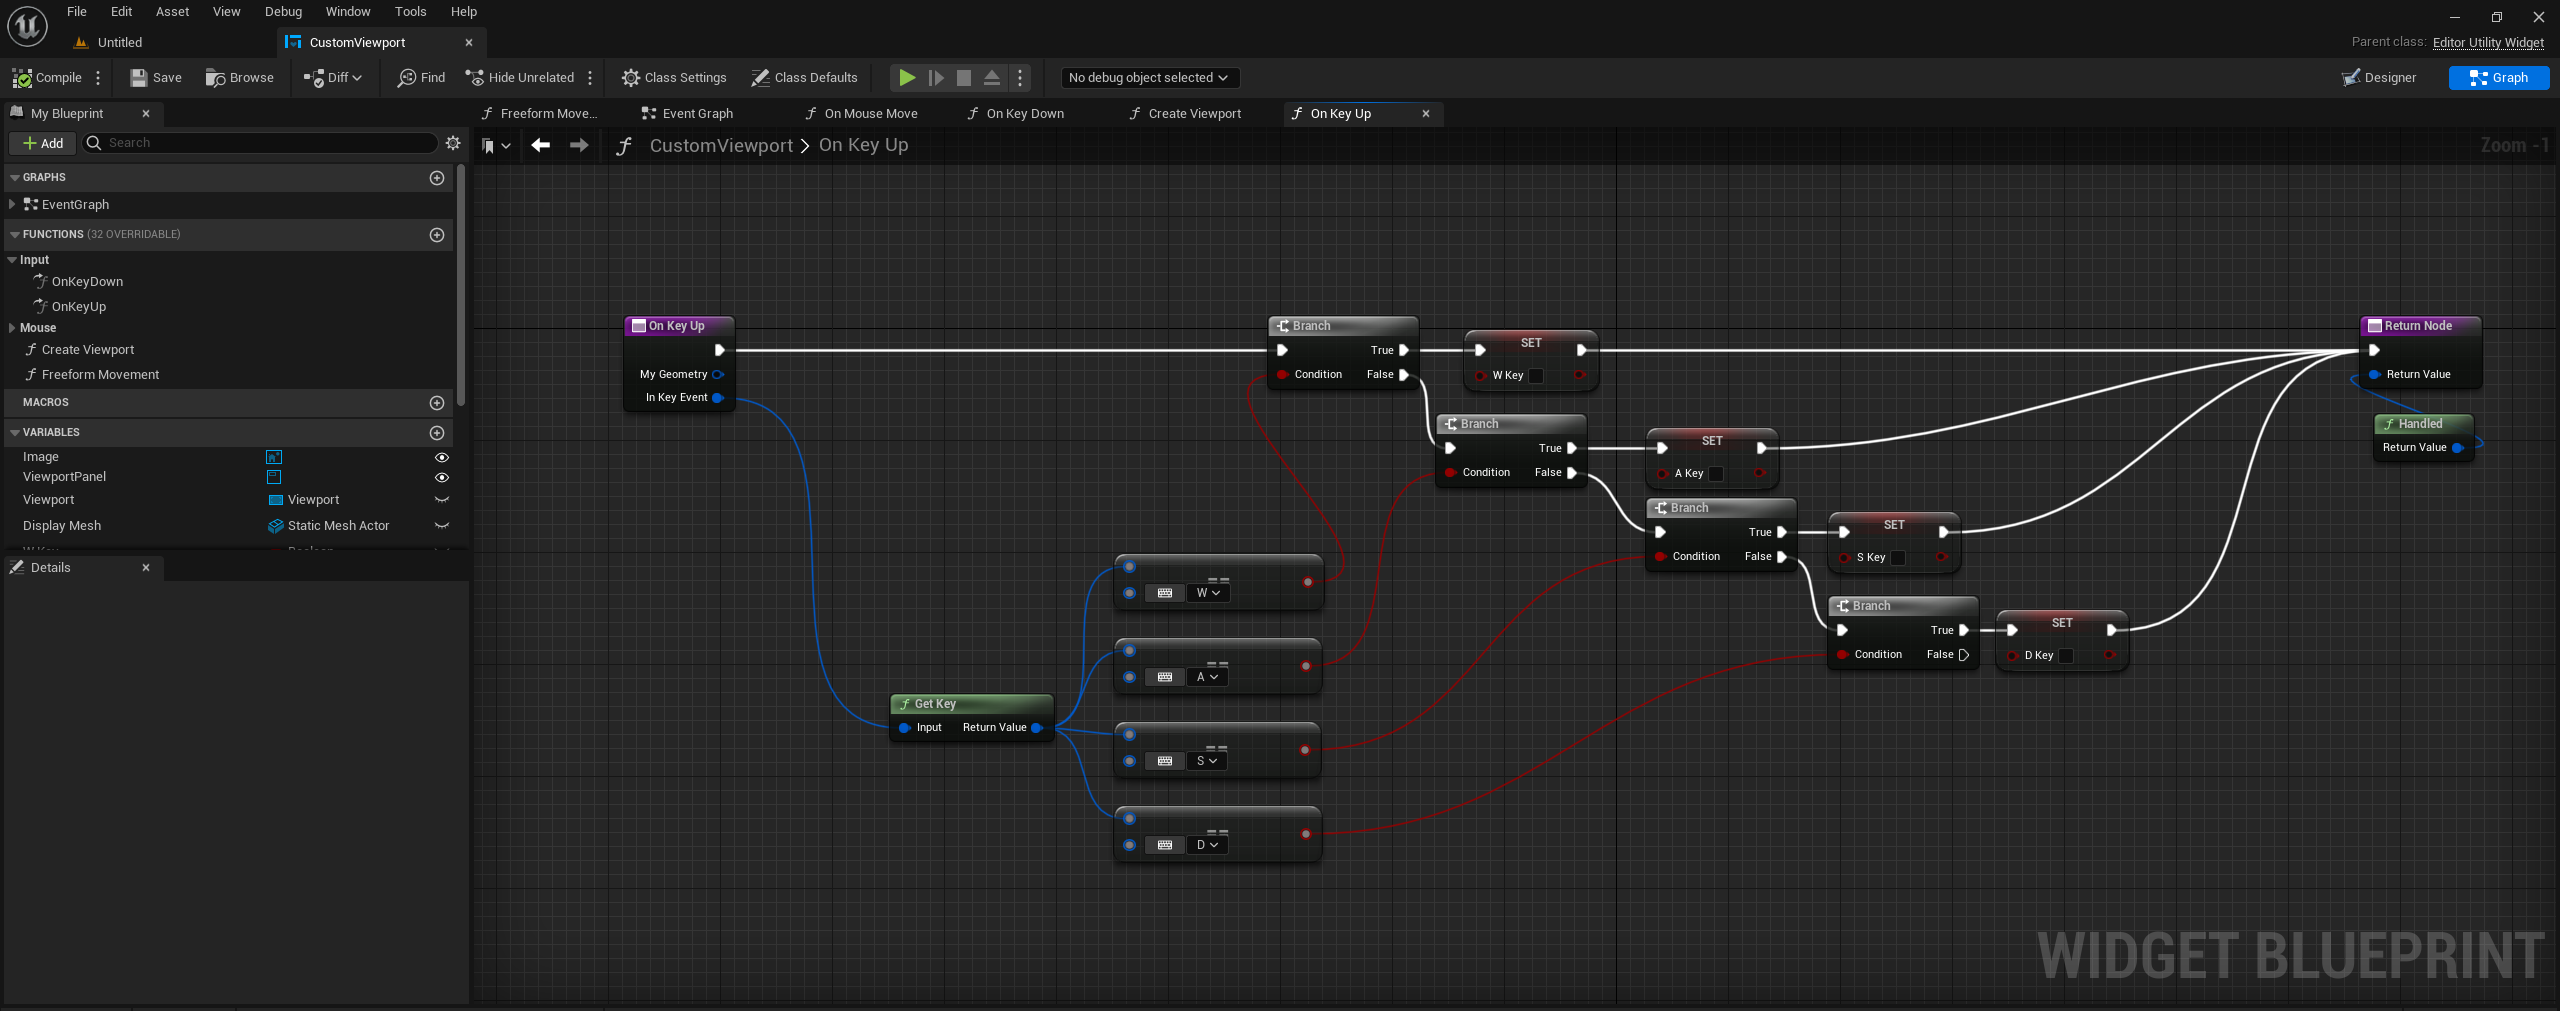
The first 2 overrides we're going to use are On Key Up/Down, with their innards being exactly the same, sans boolean settings.
We set this up to detect when WASD are pressed/release; this is used to control the viewport location movement.
Function Overrides - On Mouse Move
On Mouse Move is where the magic happens. What we do is use the mouse event to get the cursor delta X&Y, which we use for the camera rotation.
We also detect in this function if the right mouse button is pressed down, and the reason we do it on Mouse Move and not its own override is that if you try to detect mouse down as its own override, it consumes the input and we can't proceed with making our camera move.
Additionally, we check if we're inside the widget that way we're not controlling the camera movement if we aren't.
Finally, create a new function to house your camera movement logic.

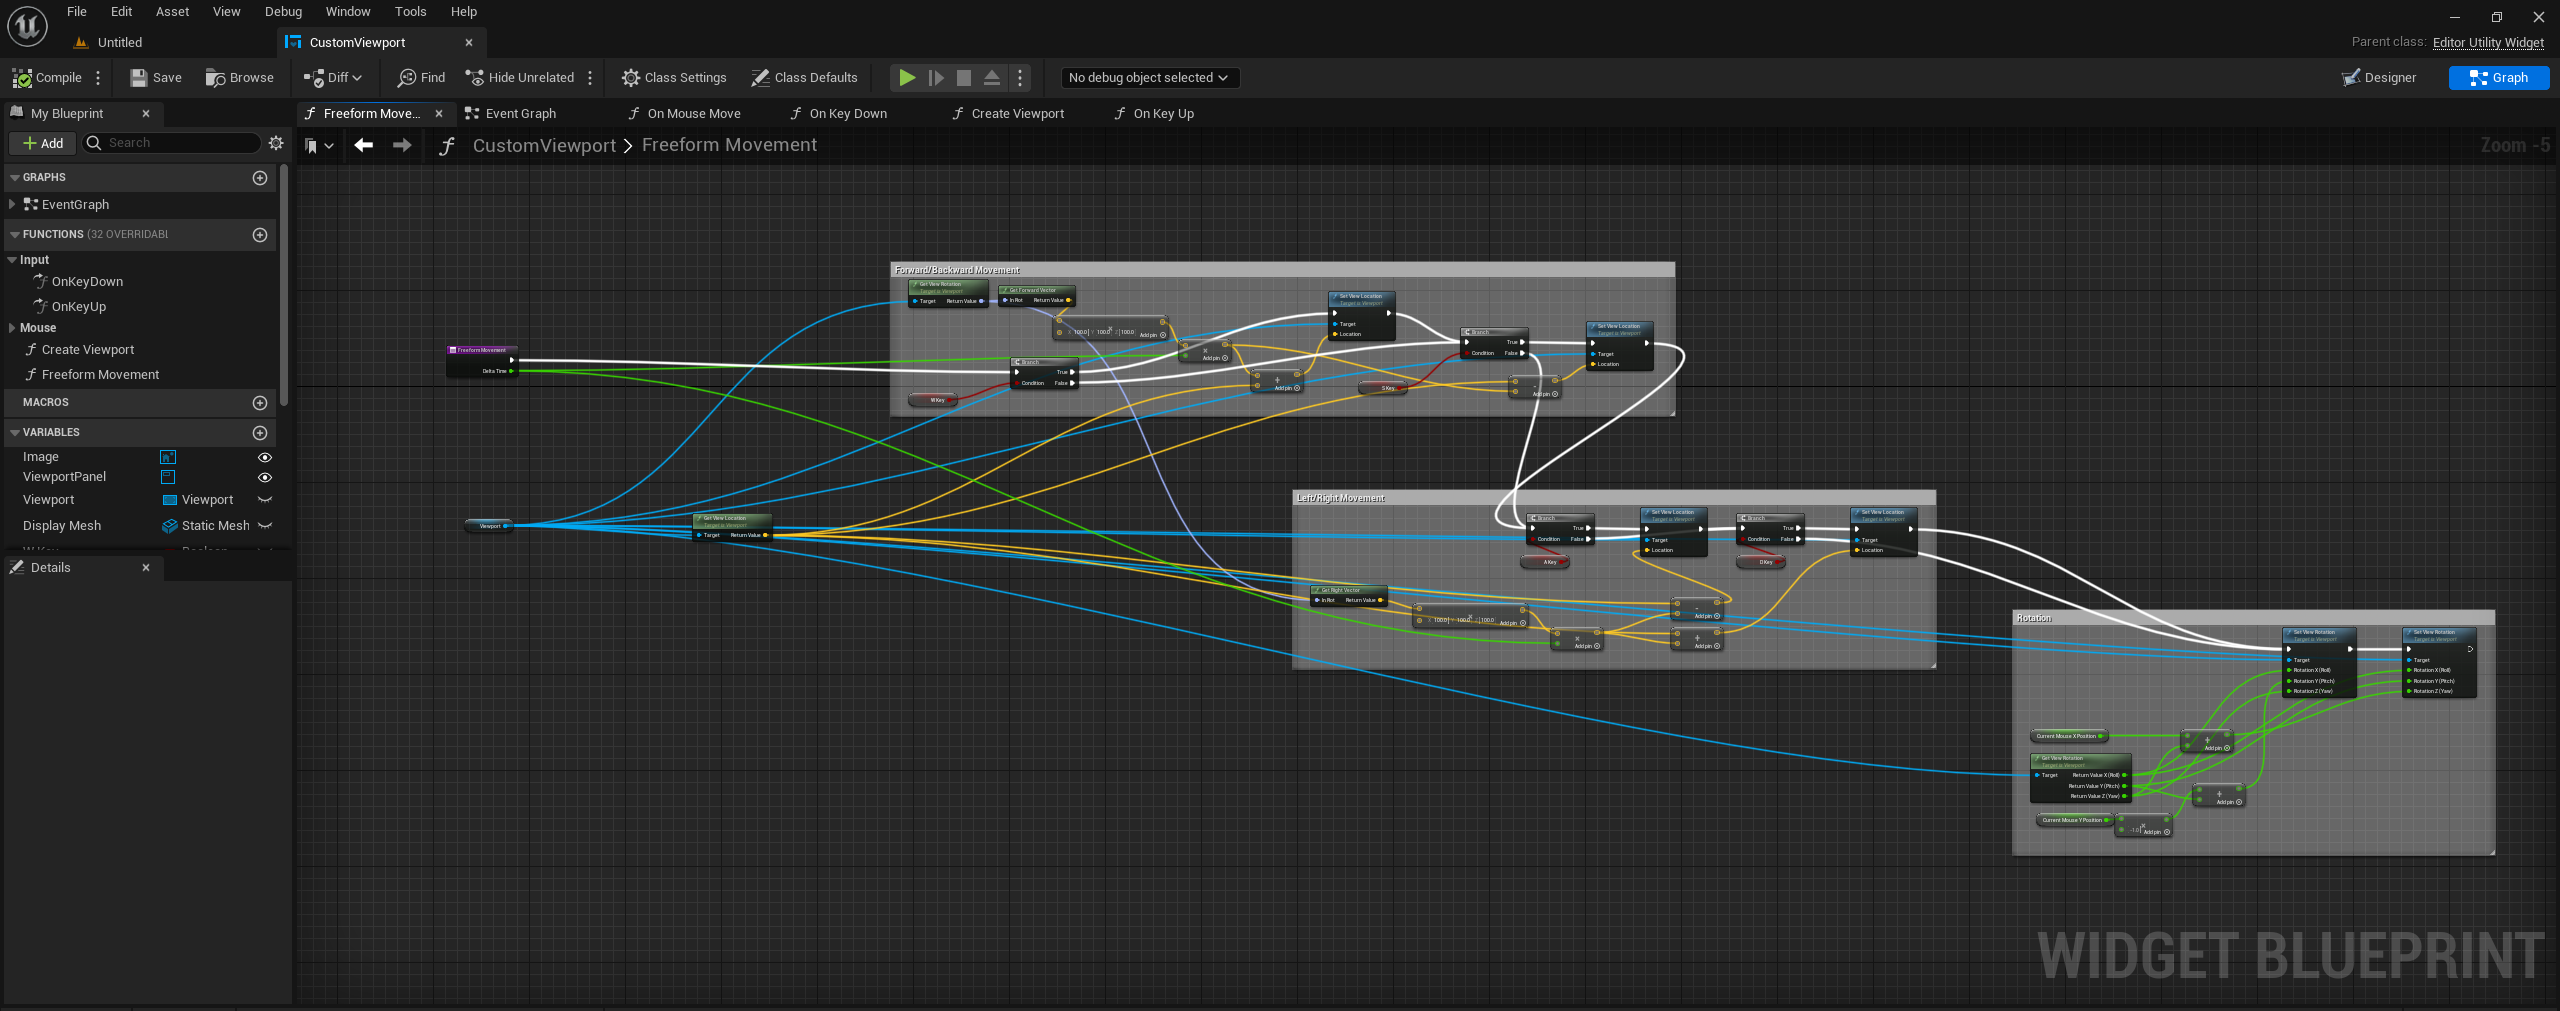
Camera Movement Function
This is the final part of our camera controls, and again, the logic here can be replaced with your preferred method; this is simply an easy way to replicate camera movement.
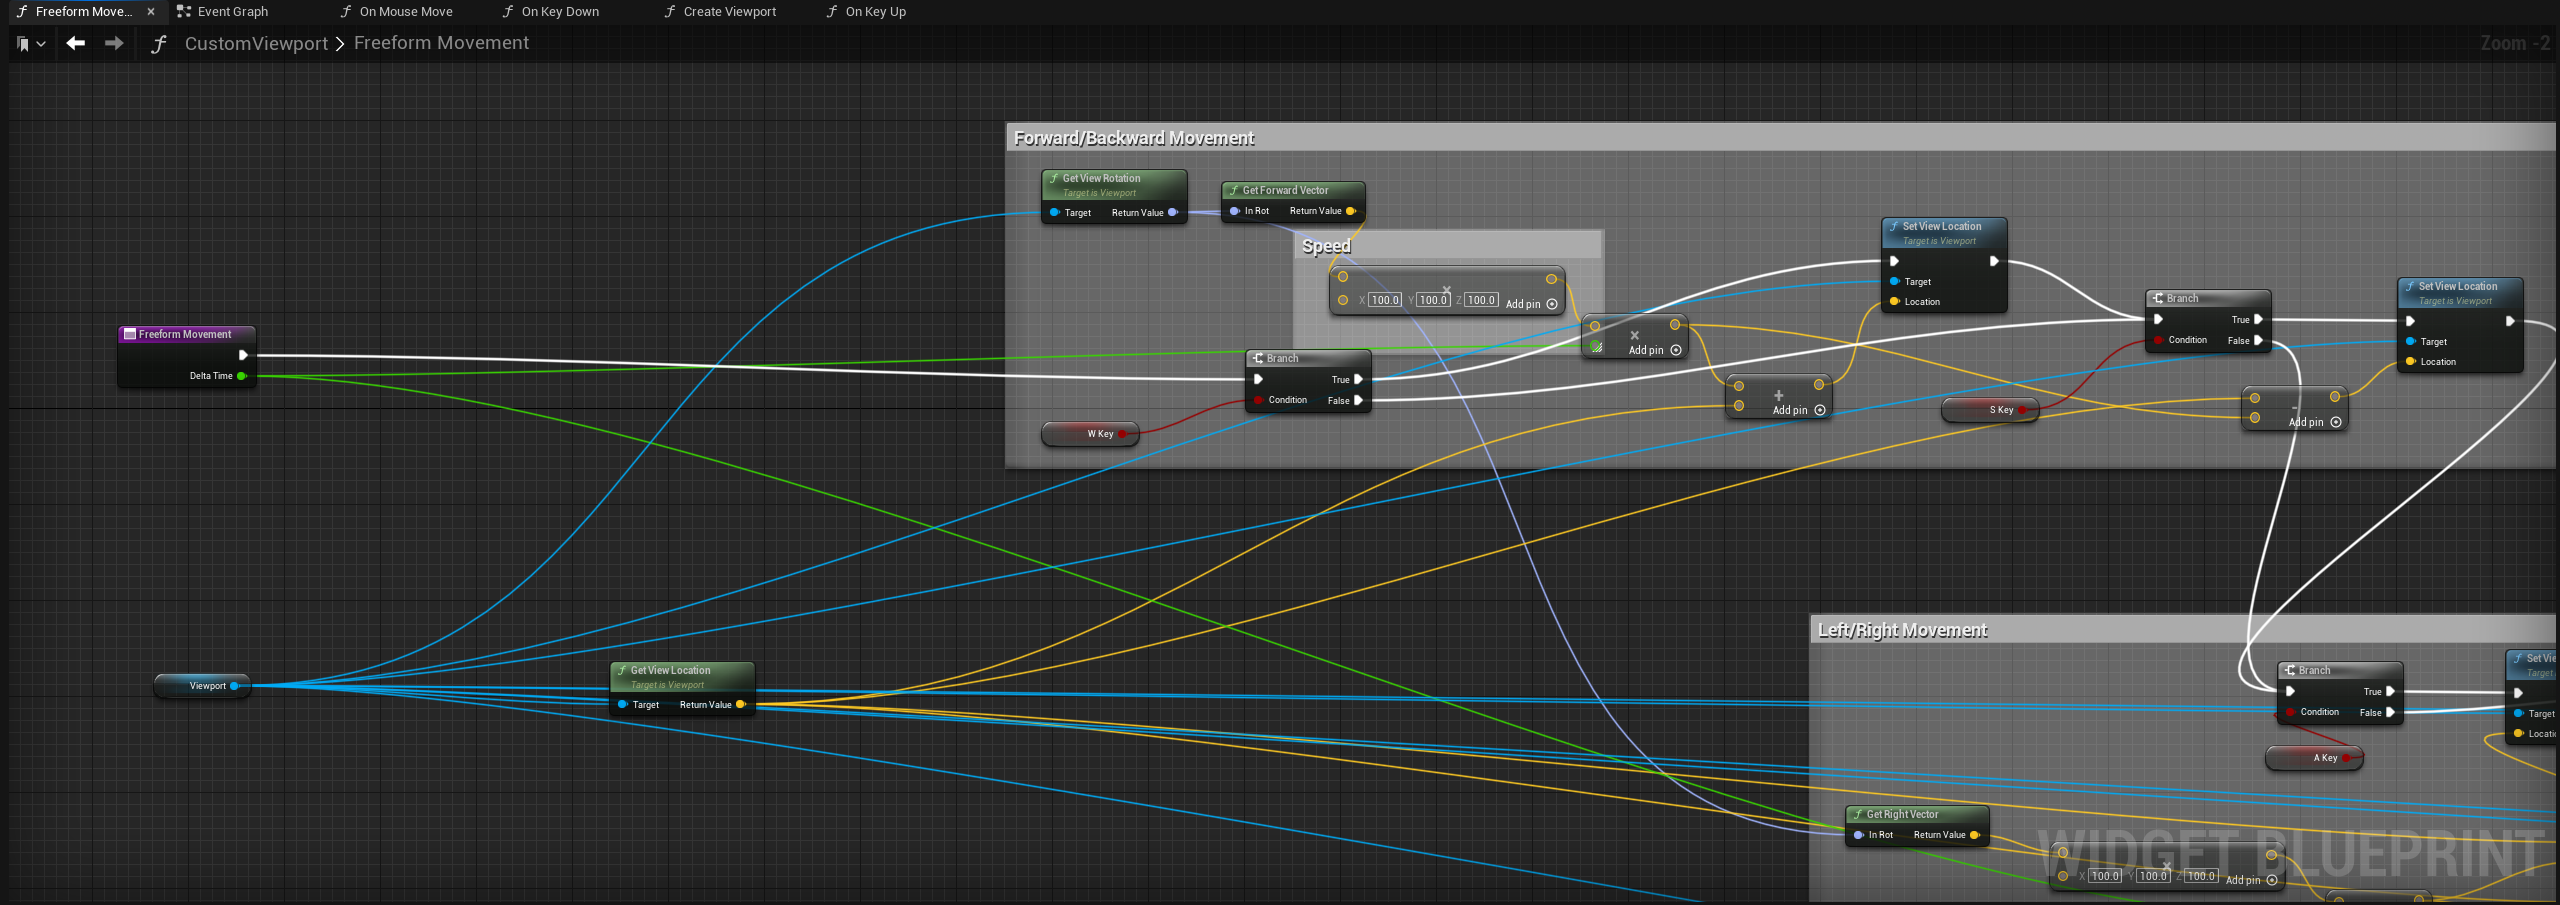
If we want our movement to be accurate, it needs to take our view rotation into account. To do this, we get the current View Rotation, get the Forward Vector, multiply it times a speed and then times the Delta variable we set before. Finally, we add it to the current View Location. To setup backwards movement, we do the same thing but subtract from the current View Location instead.
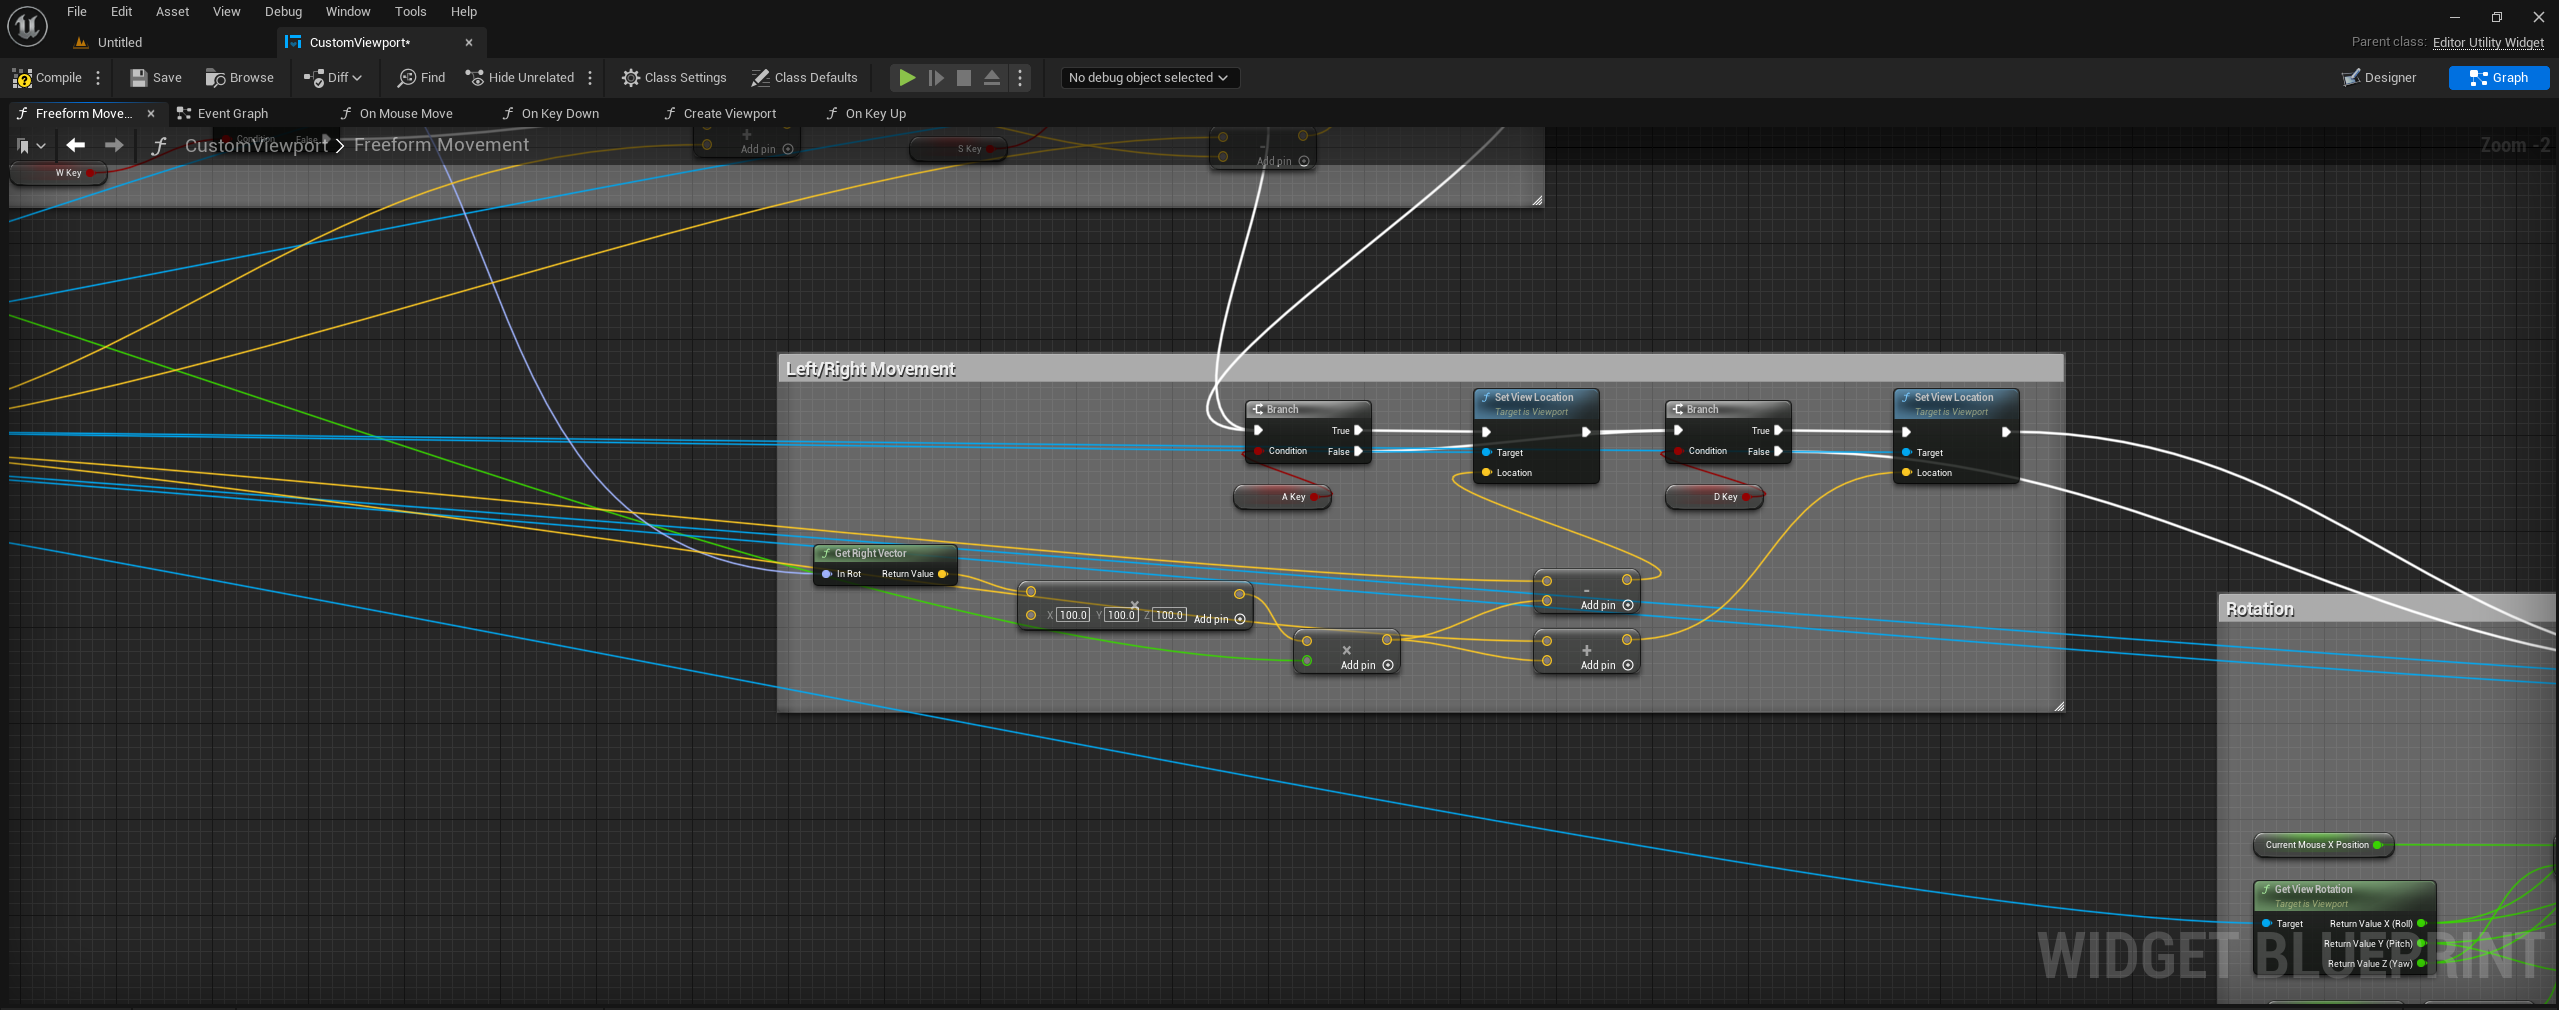
For left and right movement, it is exactly the same setup, just with the Forward Vector being replaced with the Right Vector.
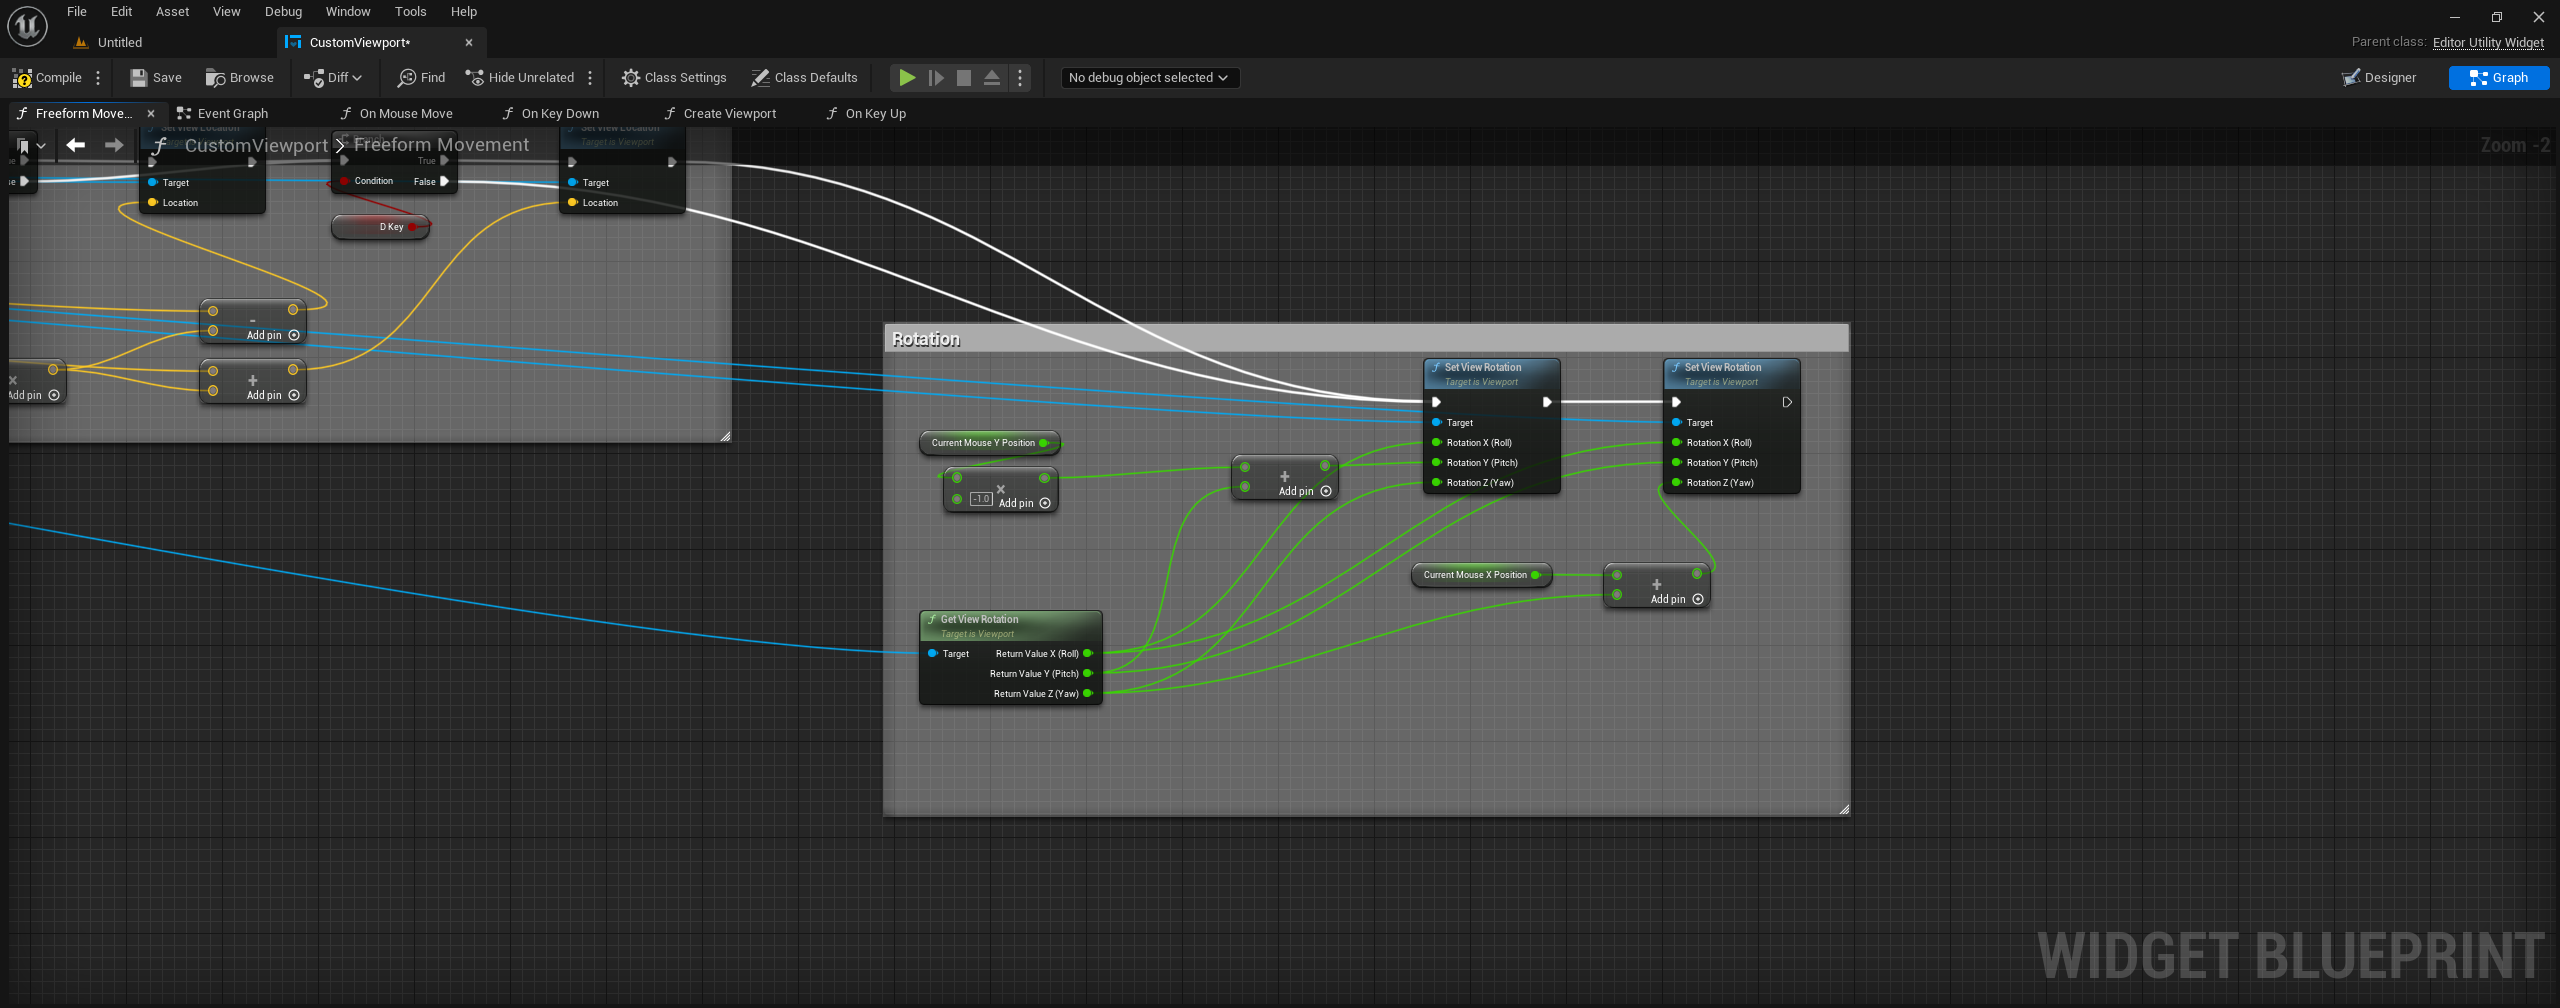
For rotation, we use the Current X & Y position we set earlier from the cursor delta to set our rotation axes.
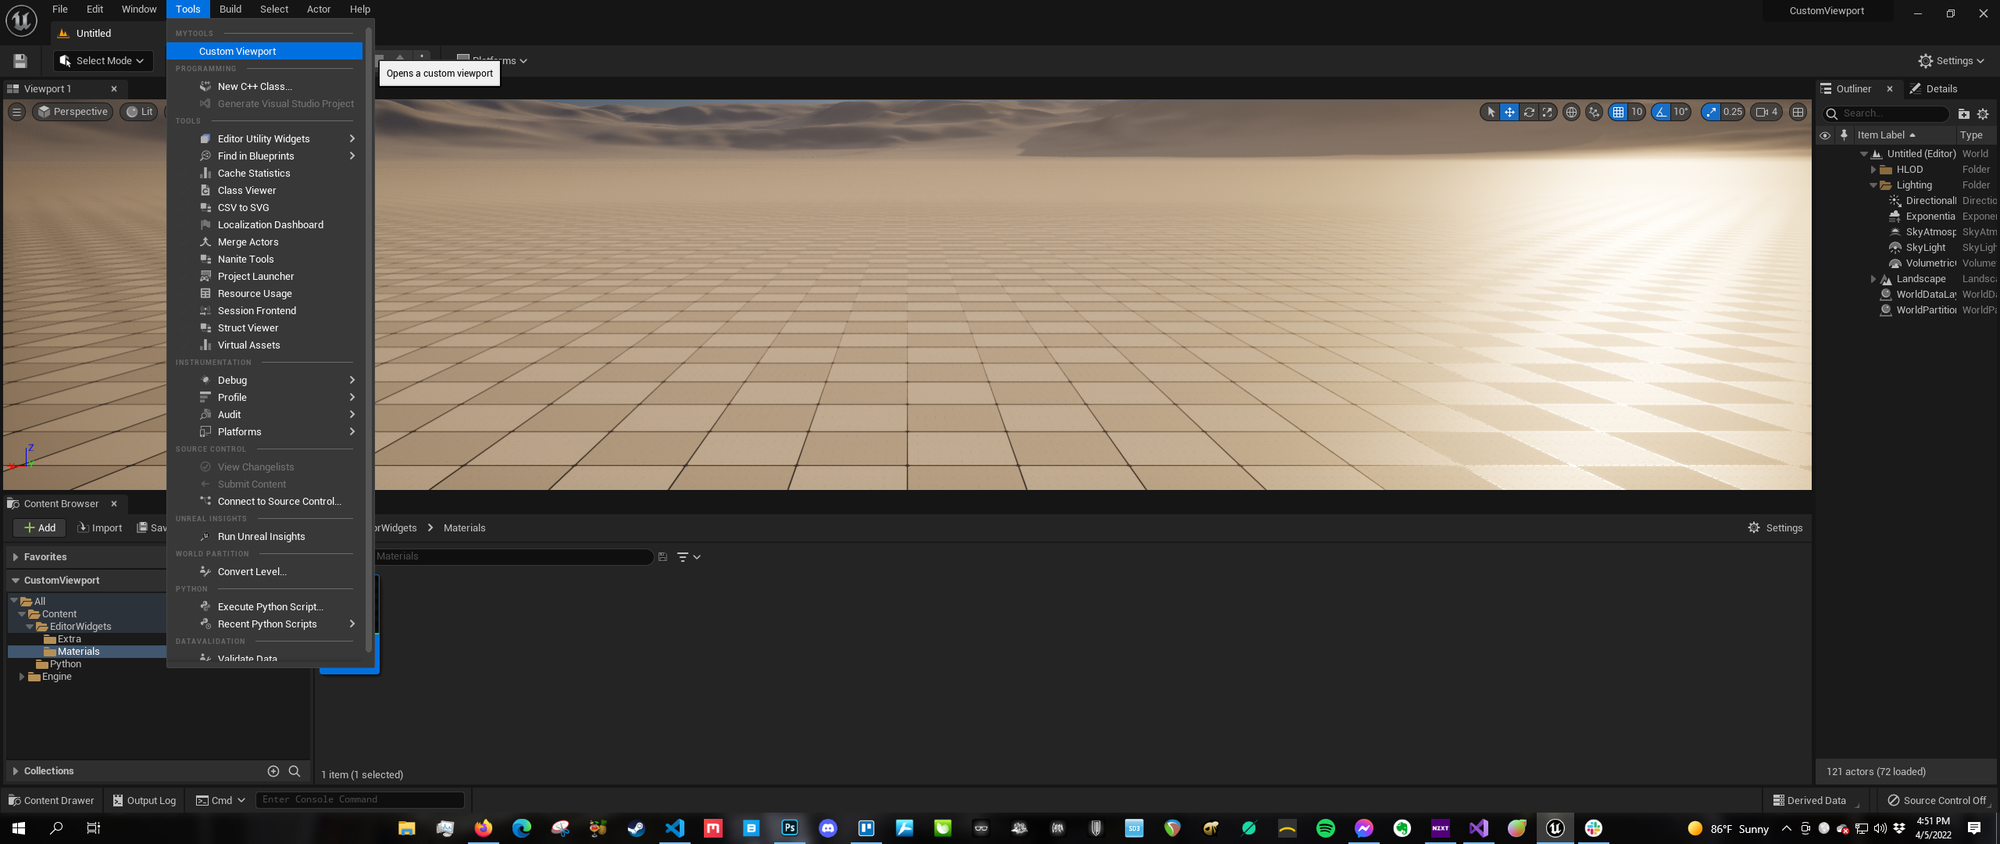
Setting up the Tools Menu Entry
This is a neat way to be able to run your viewport widget without needing to go to the content browser. All that's needed is a little Python script, which I will provide here. The file must be named init_unreal.py and placed into the content browser, and the reason for this is that Unreal will detect that file on startup and run it, meaning our menu entry gets added automatically on startup.
import unreal

menu_owner = "UniqueOwnerNameForThisScript"
tool_menus = unreal.ToolMenus.get()

#If the menu's owner already exists, unregister it so we can repopulate it.  Only need this while testing over and over
tool_menus.unregister_owner_by_name(menu_owner)
#Extend the menu you want to edit
menu = tool_menus.extend_menu("LevelEditor.MainMenu.Tools")

#Add a new section for your menu entry to live in
menu.add_section("myNewSection", "MyTools", "", unreal.ToolMenuInsertType.FIRST) #MyTools text is the Section name of the Tools menu

#create a new entry button
entry = unreal.ToolMenuEntryExtensions.init_menu_entry(
        menu_owner,
        "myEntryUniqueName",
        "Custom Viewport", # Entry Name
        "Opens a custom viewport", # Tool tip
        unreal.ToolMenuStringCommandType.PYTHON,
        "",
        "import unreal;asset_ref = unreal.load_asset('/Game/EditorWidgets/YourAssetNameHere'); unreal.EditorUtilitySubsystem().spawn_and_register_tab(asset_ref)") # Replace the path in parenthesis to your asset path

#This adds our new entry button to the section we made
menu.add_menu_entry("myNewSection", entry)

#/Game/EditorWidgets/CustomViewport is an example of the path you want to use.