Creating a Custom Viewport without C++ - Part 2

Introduction
This is the follow up to the previous tutorial, which hopefully won't run too long in text form. The original video tutorial for part 1 came out 3 years ago, and I didn't make a follow up video until 11 months ago, which did not come with a companion article. I aim to rectify that now.
Reasoning for a follow up
After releasing part 1, I received (and subsequently neglected, though not intentionally) a number of comments mentioning that there were issues with the directional light and skylight setup. It took me finally looking at my comments one evening and deciding to try to fix it, even after so much time had passed.
What were the issues exactly?
The directional light issue was due to the viewport containing more than one directional light in the scene, and in my defense, was not apparent in 5.0 when I made the tool in the first place; it was only in later versions that a warning would appear directly in the created viewport. As for the skylight, this was a much more annoying issue to track down, and led me to the engine code where I found that the viewport class contains a directional light and skylight component, both of which are not exposed to blueprints, nor can you hackily try to access them to try a workaround.
First fixes
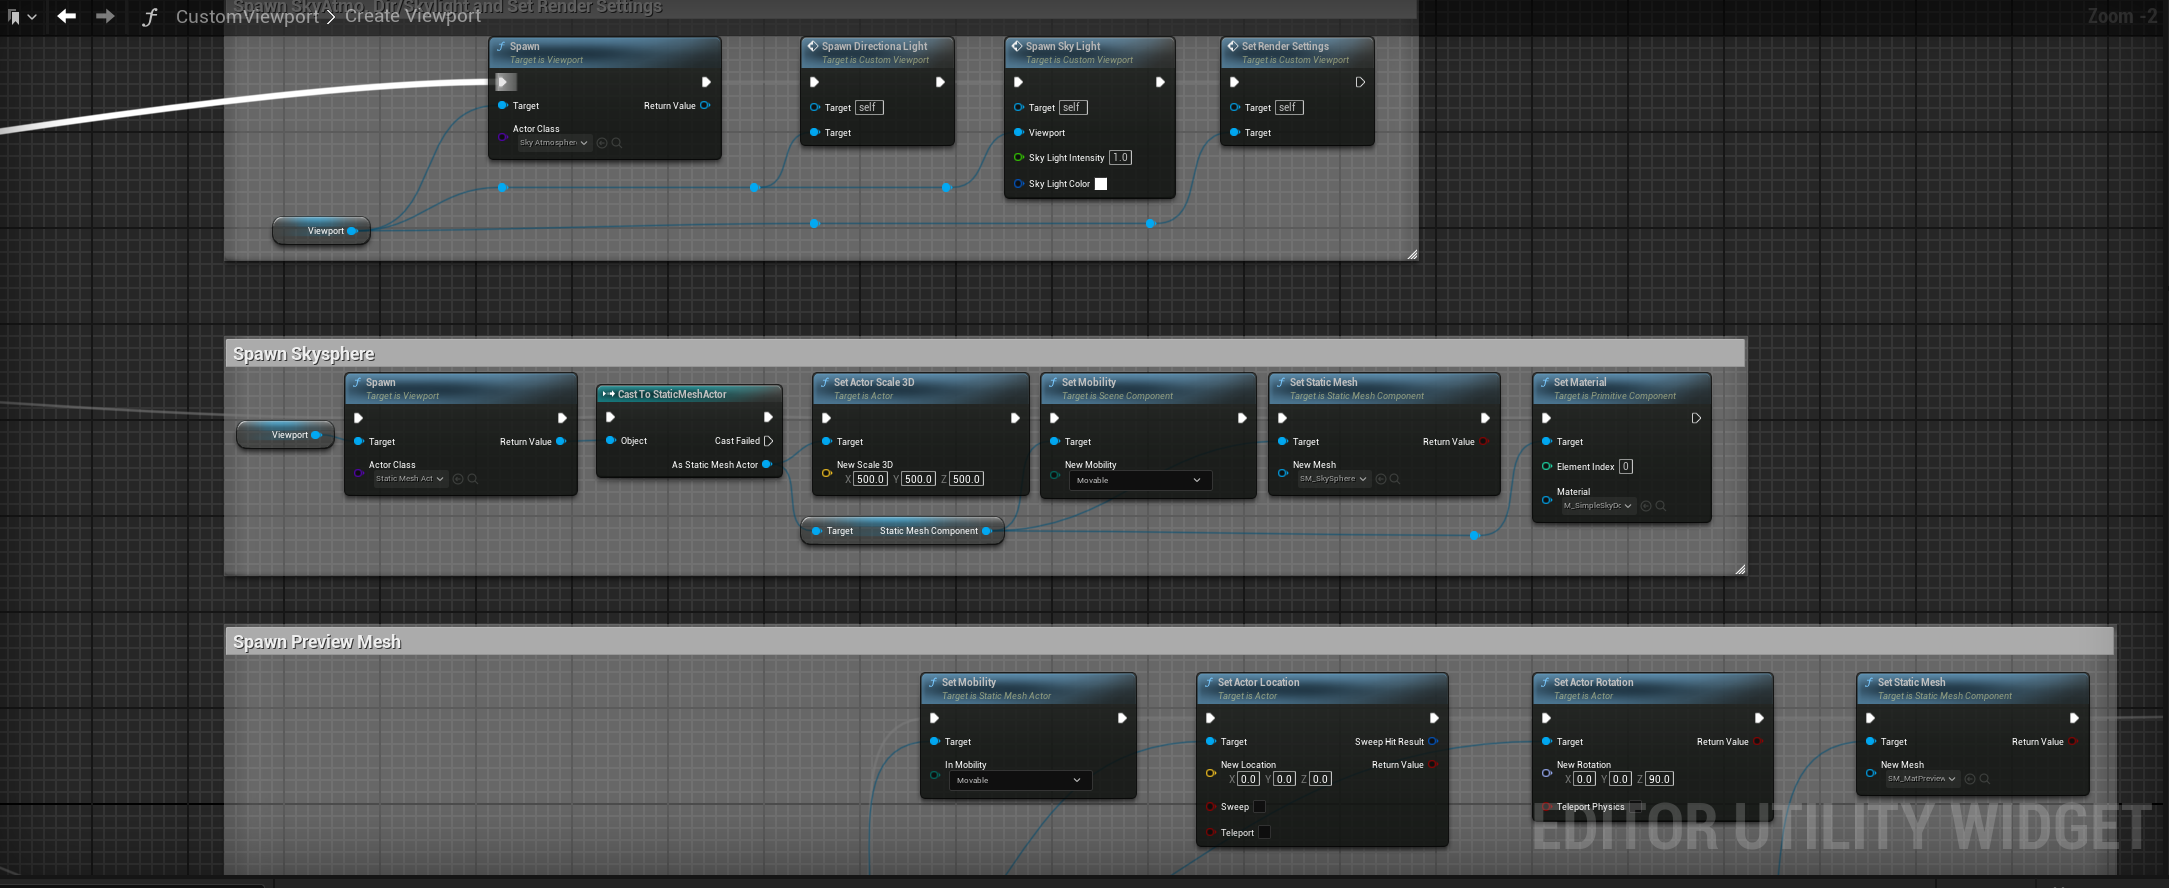
So how do we go about fixing this if we cannot access the very things causing the problems? To start, we go into the Create Viewport function, get a reference to the viewport and set both the skylight and directional light intensity to 0, effectively disabling them. This can be confirmed by the multi directional light error disappearing from the viewport.
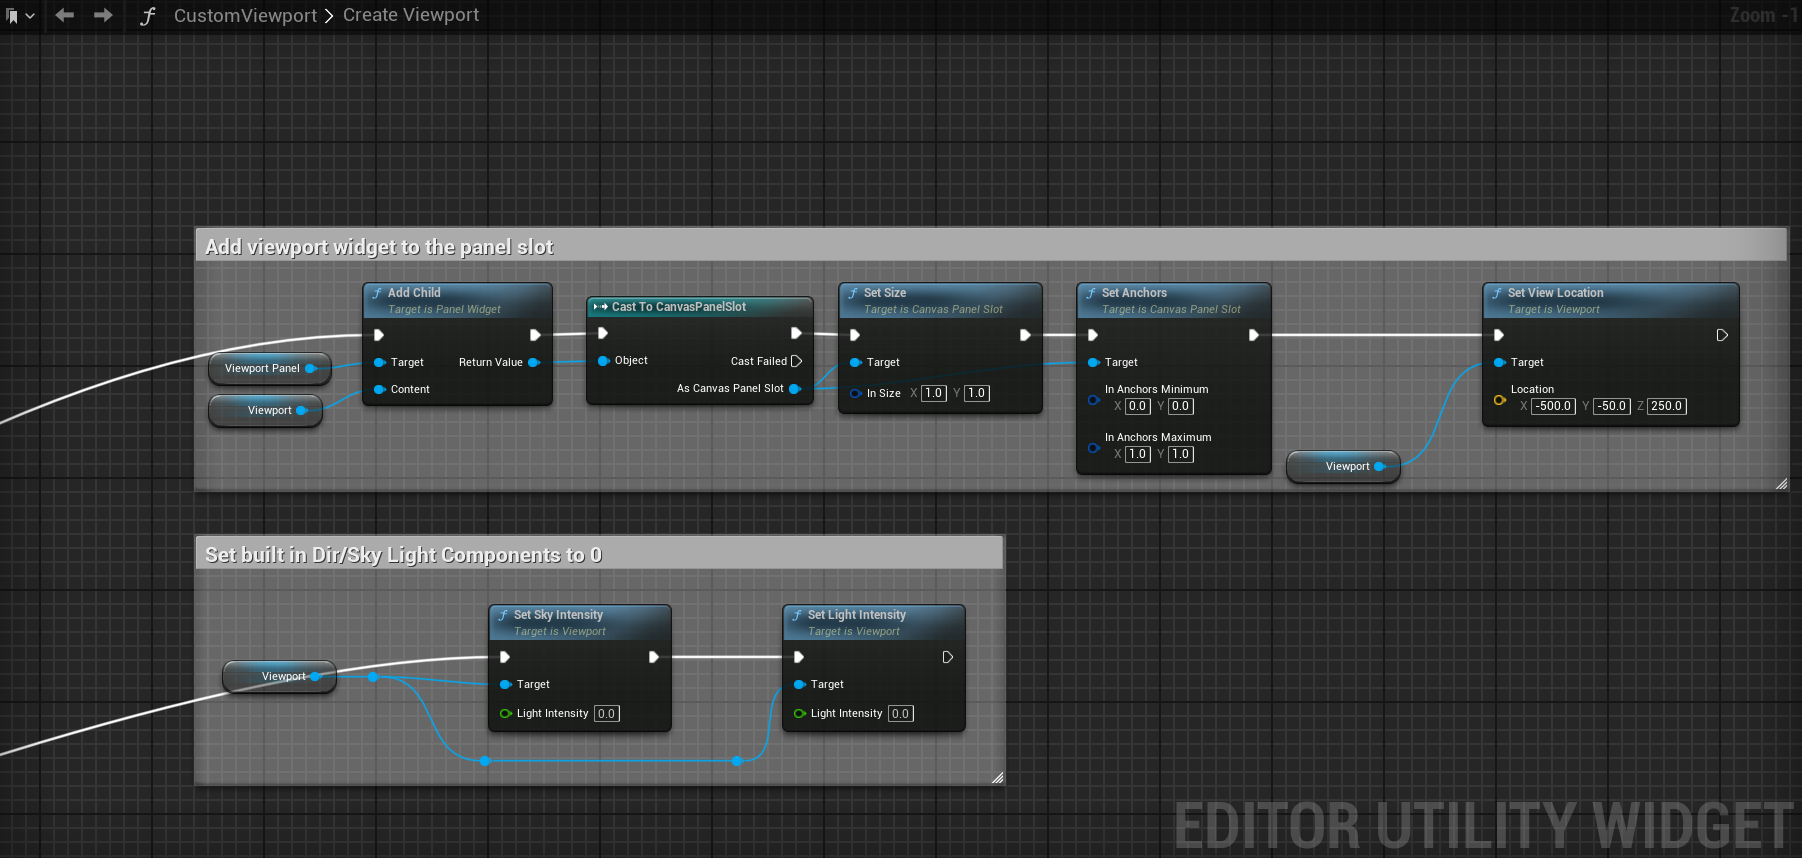
Again, the issue is that we cannot control the existing components contained within the viewport class, so we need to add our own and expose whatever controls we deem necessary.
Let's start with the directional light function. I'll be using blueprintue.com embed for a few of these functions so you can copy and paste if you so choose.
Fixing the sky light
The directional light is extremely straightforward, so I won't be explaining what it's doing. However, the sky light is where things got tricky and caused me a headache for a couple of hours. All the comments left on my original video were saying that the sky light was not actually contributing to lighting, and that eventually lead me to the source code, where I found that the component had Real Time Capture disabled. So with no way to access that setting from our viewport directly, we must add our own sky light to the viewport scene.
Where this provided a little headache was that Real Time Capture was not something that was dynamically settable, so the workaround I used at the time was to create a blueprint containing just a skylight with Real Time Capture enabled, and spawned that.
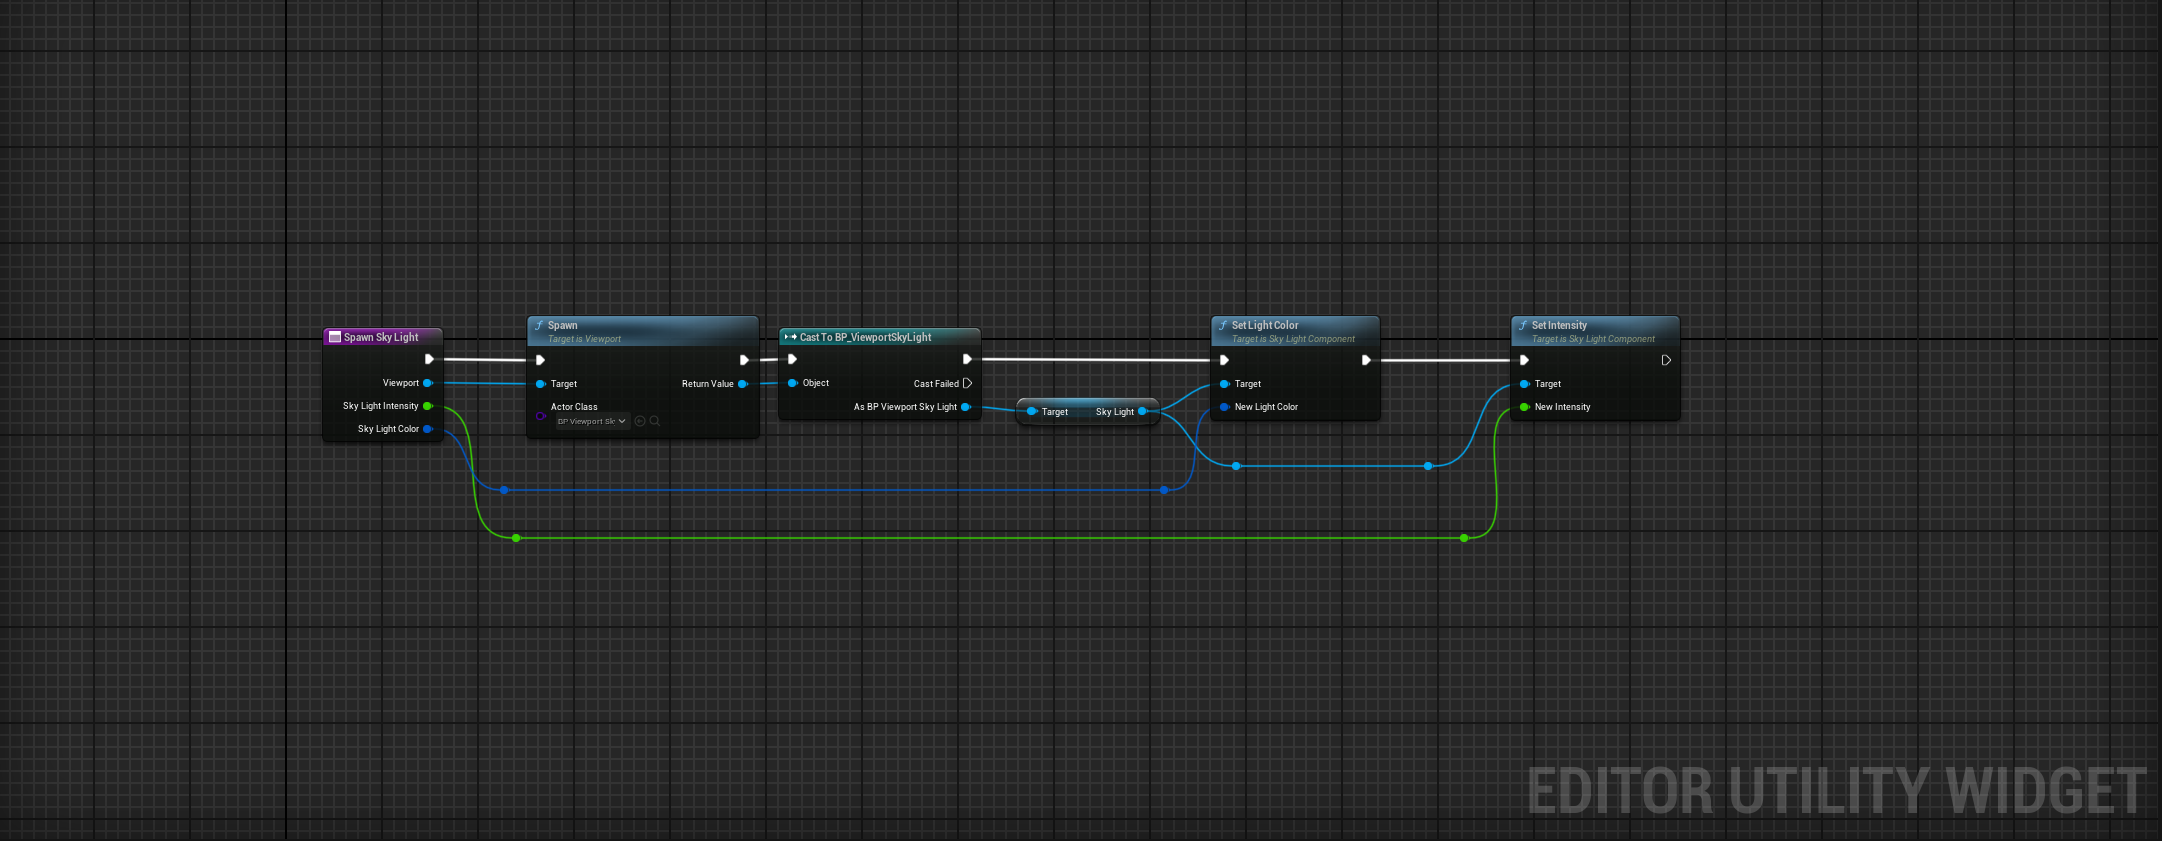
This works, but as of 5.6, Real Time Capture is now exposed, so you can simply replace the secondary blueprint with this:
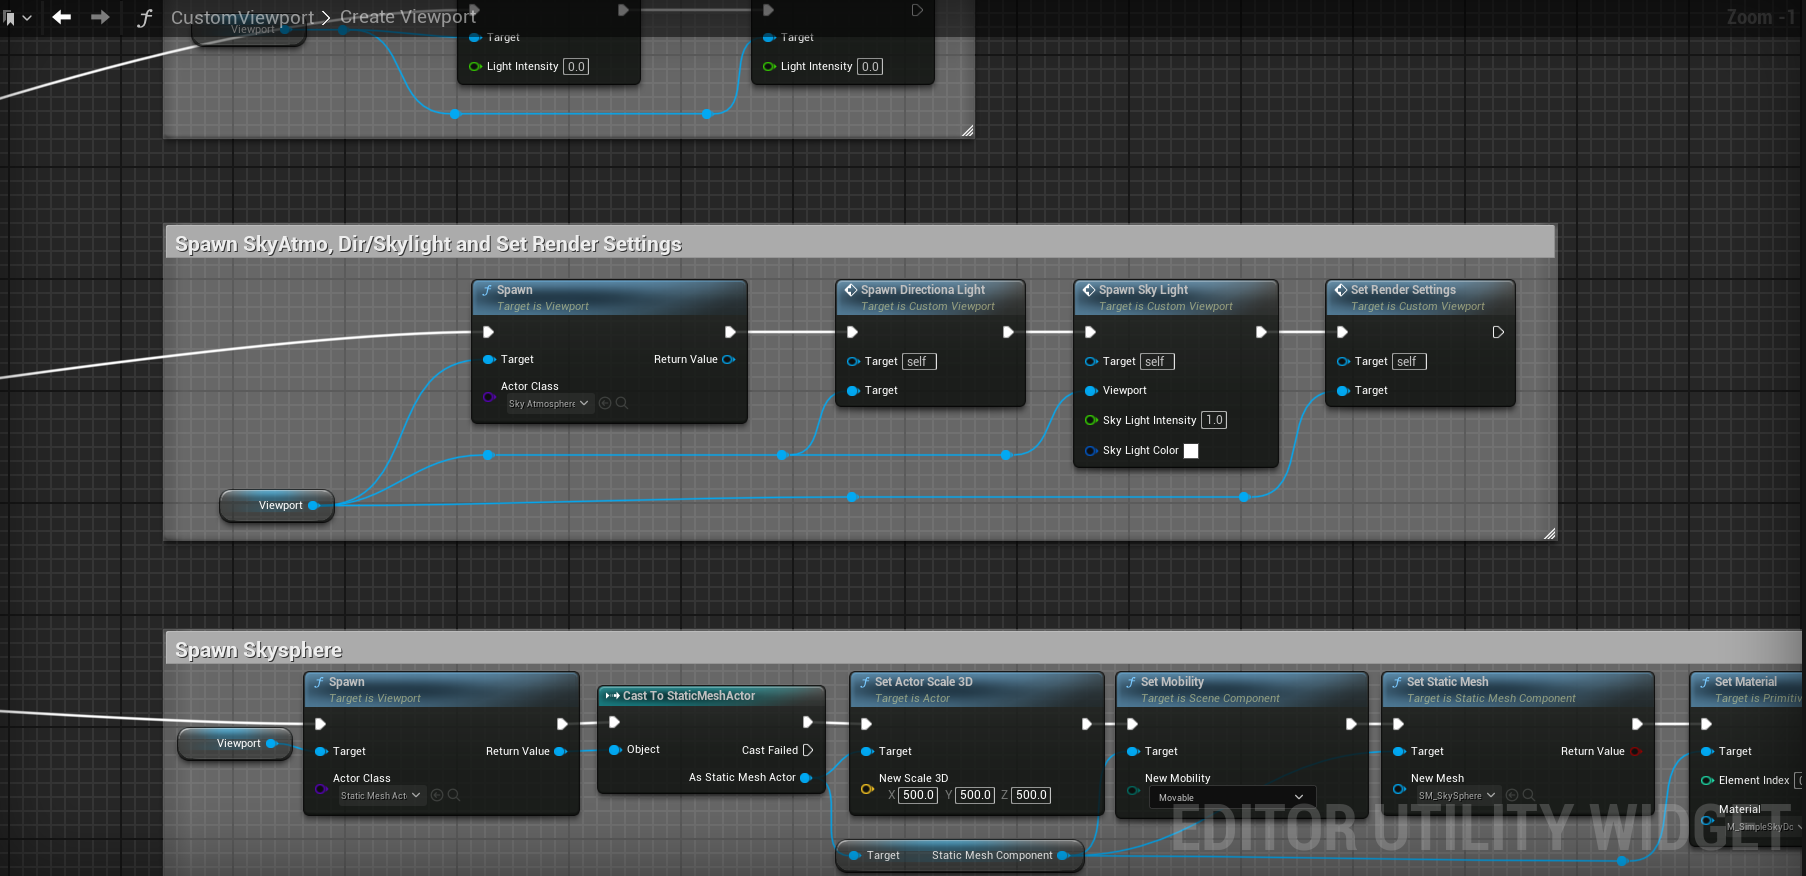
Skysphere management
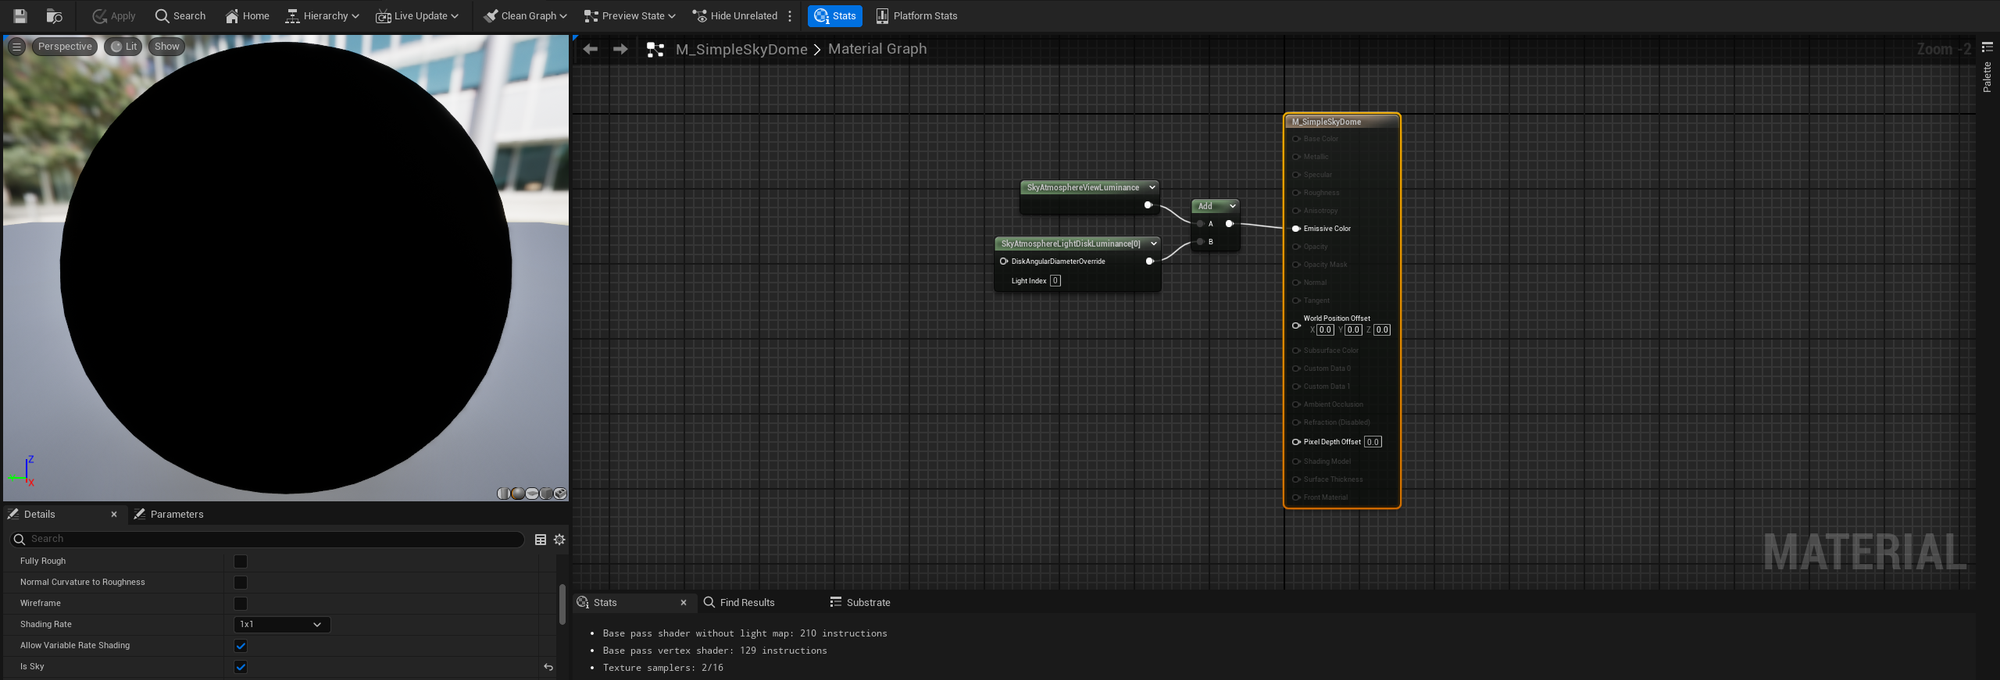
With that out of the way, there's one more thing that you must do to have the sky working properly, and that is make sure that the material you have assigned to your skysphere has the usage flag Is Sky set to true.
Adding Lumen to the viewport
With those issues solved, I became curious about utilizing Lumen inside this viewport, and while rummaging around the viewport source code, I found the requisite functions needed to do this. In one of the earlier screenshots in this article, you may have seen a node called Set Render Settings. Here is that function:
The viewport class has a function you can call named Set Enabled Advanced Features, which contains a lot of post processing Show Flag commands. It automatically sets a lot of these flags for you, but conveniently does not enable the Lumen flags, which is why we manually do that for Lumen Global Illuminations and Reflections. You can find a good bit of these flags in ShowFlags.h, which means you can bypass Set Enabled Advanced Features and only enable what you want. In any case, here is what Viewport->SetEnableAdvanceFeatures is calling when you toggle it on and off.
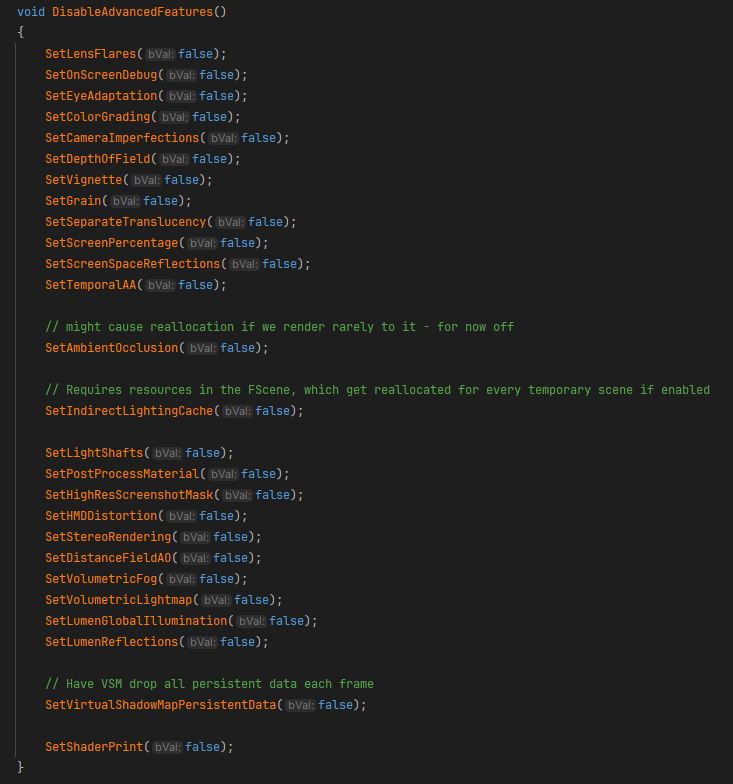
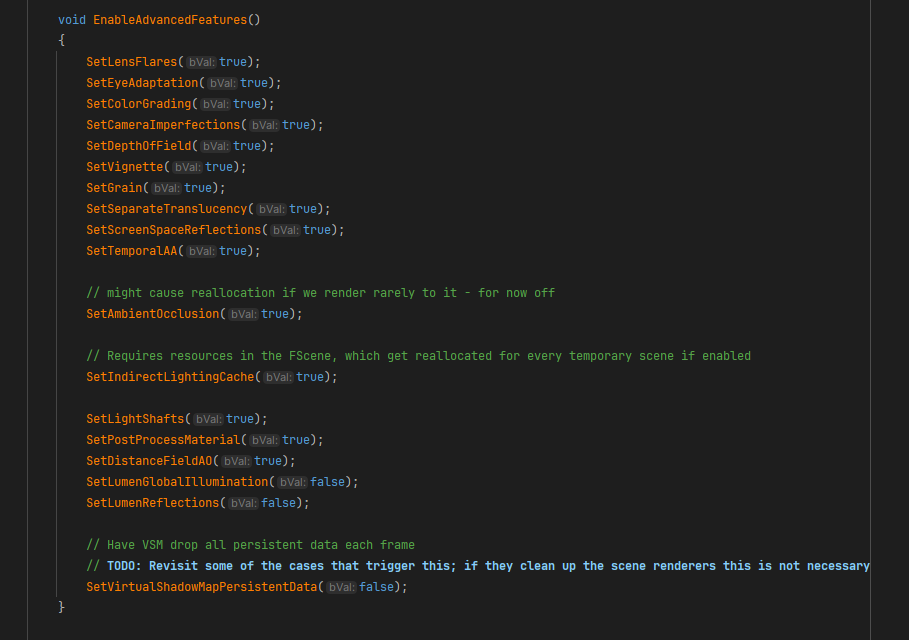
There are a lot of other show flags in there, so feel free to experiment.
Final words
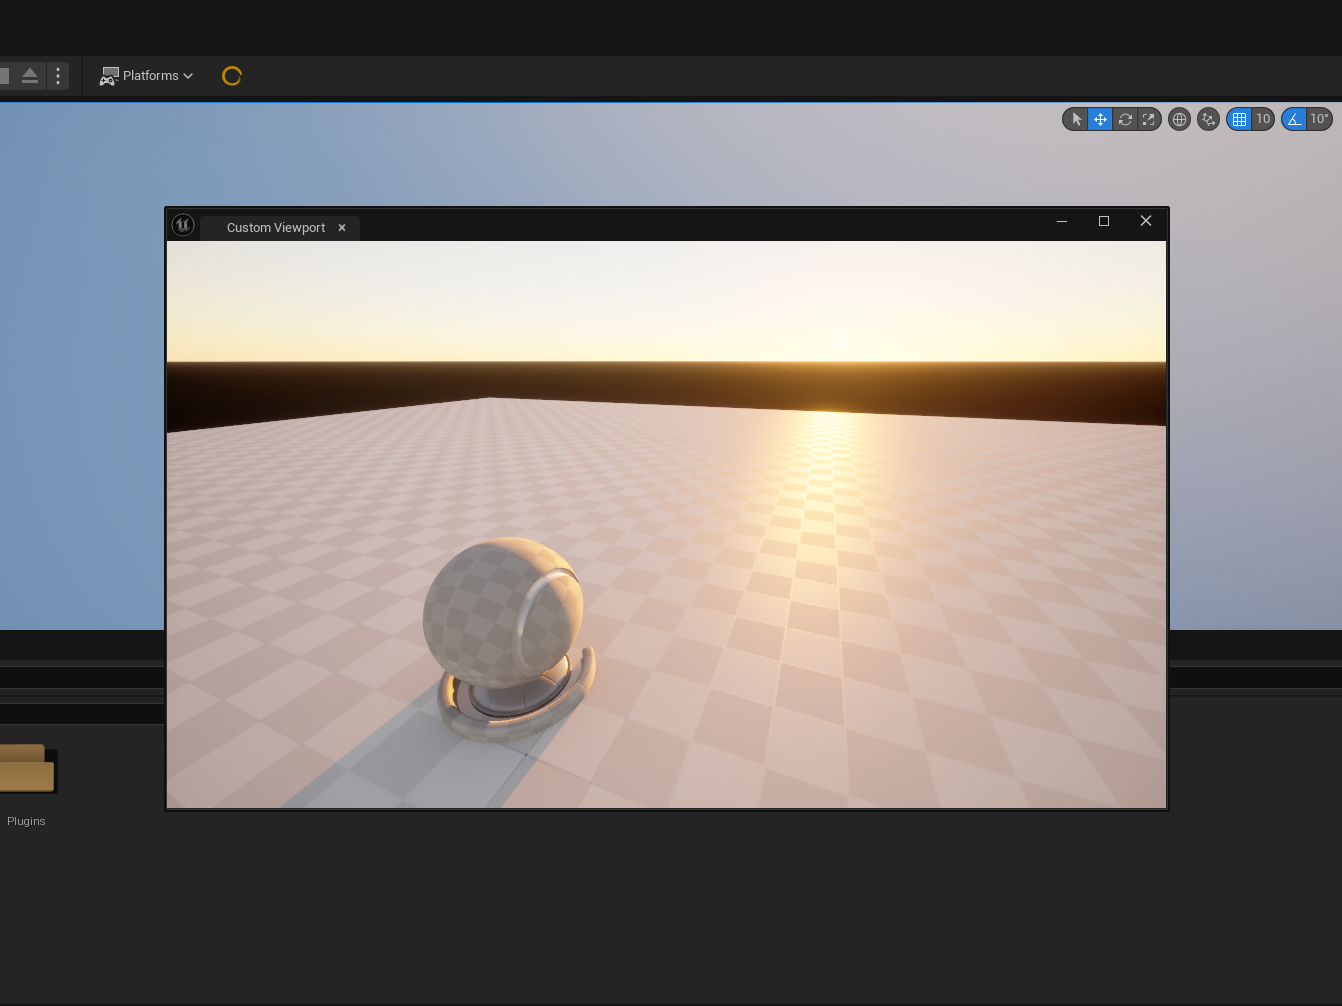
So we fixed our lighting issues and added support for Lumen, which means that's pretty much a wrap for this tutorial. After the lighting, I spawn the preview mesh, rotate the viewport camera to look at it and spawn a floor, but you should be able to handle that if you've made it this far.
I've considered a part 3 for this for a long time now, but genuinely cannot think of a good use case that doesn't involve properly setting things up in C++. If any of you have an idea, leave a comment and I'll keep it in mind for a future post. Until next time!